Getting Started: Using Zoom as a Classroom
Prepared by Lisa Rourke and Eli Jacobson
Table of Contents
- Introduction
- Equipment Needs
- Scheduling Your Virtual Class Meeting(s)
- Starting Your Virtual Class Meeting
- Conducting Your Virtual Class
- Before Your First Official Zoom Class
- Frequently Asked Questions and Support
Introduction
This document is intended for instructors to teach their class remotely using videoconferencing; specifically, Zoom.
Equipment Needs
To use Zoom, you will need access to a camera and audio source. These may be already integrated into your computer. If not, you will need a webcam and microphone device. The microphone could be part of the webcam, a USB headset or a telephone.
Scheduling Your Virtual Class Meeting(s)
- To set up your Zoom account, visit brandeis.edu/its/services/communication/zoom/ and click "login" (students do not need a Zoom host account — they will have immediate access from the link you provide).
- Click on "Meetings" in the left sidebar.
- Click on "Schedule" to set up a Zoom meeting room.
- Once you've created your meeting, Zoom will provide you with a link that can be shared with students. We have highlighted where to find this in the demo below. Post the link to your LATTE page and share through "course news and announcements" for students to access your class.
- If you want to make a single, re-usable link for all of your zoom sessions, do not schedule a date and time for your meeting; instead, check the "recurring meeting" box and choose "no fixed time" as shown in the demo below (recommended). Alternatively, you can choose a date and time for your class.
- Click "Save."
- Copy the "Join URL" link under "Invite attendees" and post this to latte and share through "course news and announcements."
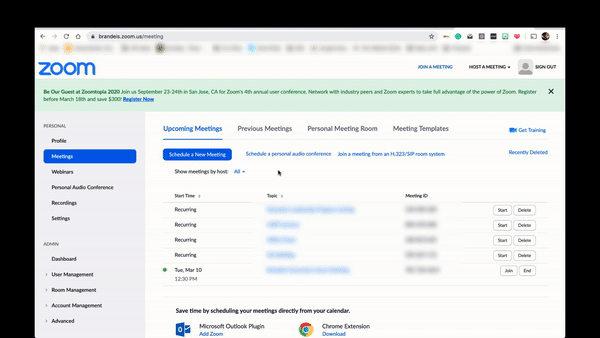
- See additional documentation for scheduling a Zoom meeting.
Starting Your Virtual Class Meeting
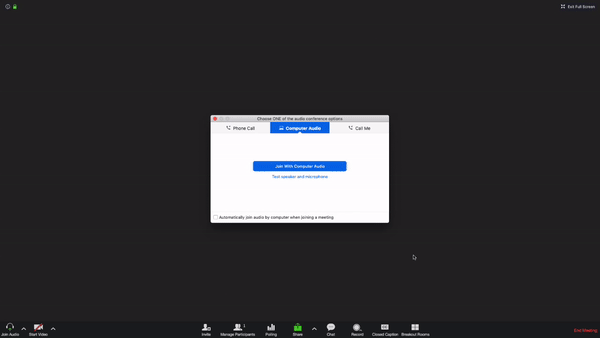
- Shortly before your meeting begins, login to Zoom, go to the "Meetings" section, and click on "start" to begin the meeting (see demo below).
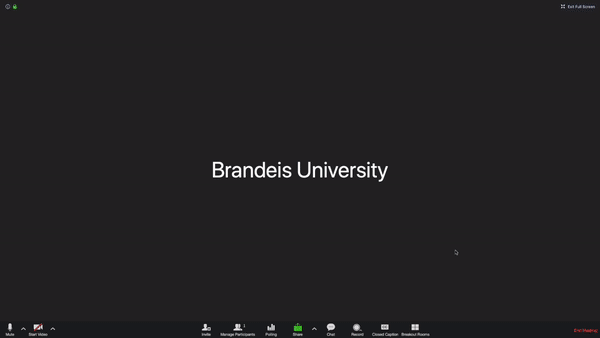
- Test your audio to be sure it works: hover your mouse at the bottom of the screen to bring up a brown ribbon. Click on the carat (^) next to "Join audio" and then click on "Test speaker and microphone" (see demo below).Zoom breakout room features.
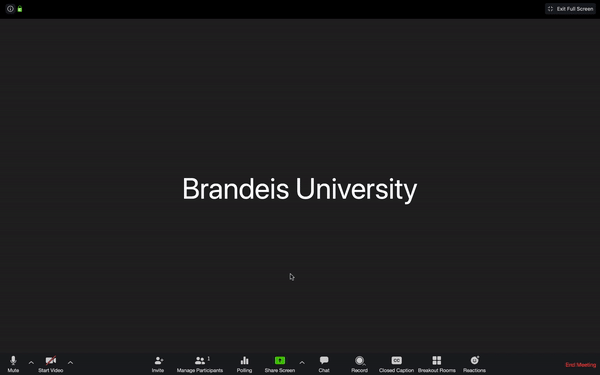
- Students will join the session by clicking on the meeting link you posted on LATTE.
- Tell students to mute themselves using the microphone "mute" button on the bottom left; this will prevent unwanted background noise during the meeting.
- Click on the "Participants" button on the bottom bar to bring up a window where you will see who has joined. The list will populate as participants arrive.
- See additional documentation on all of the host controls.
Conducting Your Virtual Class
Zoom offers a variety of features that allow one to use Zoom as a classroom. A few of these features include:
- Breakout rooms for group work:
- On the control bar at the bottom of your screen, click "Breakout groups."
- Designate how many groups you want to create.
- You can choose if you want to manually assign the students to designated groups OR Zoom can randomly assign each participant to a breakout room, which is the default option (see demo below).
- See additional documentation on Zoom breakout room features.
-
Calling on students:
- Students can raise their hands by clicking on the "hand raise" button in the participant's window (you will not be able to see the hand raise button because you're the host, but you can alert students to this feature).
- After you've called on the student, you can lower their hand by clicking on the "lower hand" button next to the student's name.
- See additional documentation on attendee controls, including the "raise hand" feature.
- Content Sharing:
- To show slides or video clips, click on the "Share screen" button on the bottom bar.
- You will then have the option to share your entire screen, share an individual application or display a whiteboarding tool.
- If you plan to share video or audio, be sure to check the boxes in the bottom of the window to "share computer sound" and "optimize for full motion video" (see demo below).
- See additional documentation on screen sharing.

- Recording
- To allow all students the most equitable access possible to the class meeting, record the meeting to the Cloud (see below) and edit the provided audio transcriptions afterwards.
- The recording feature can be used to either record your Zoom meeting OR to use Zoom to record a presentation or lecture.
- The record button is located on the meeting toolbar. You will have the option of recording to your computer or to the cloud.
- Recording to your computer means that the file will be saved on your computer and you will need to upload to another service in order to share the recording.
- Recording to the cloud will save your recording to your account in Zoom and you can easily share a link with participants.
- Cloud recordings are automatically transcribed, so the recording link will include text alongside the video.
- Cloud recordings are available for 365 days from the date of the recording. If the recording needs to be archived permanently, please be sure to download a copy to your computer and store it in the location of your choice.
- See additional documentation on cloud recordings features.
Before Your First Official Zoom Class
-
Have a practice class to troubleshoot the most common technical issues.
You may want to practice with your students by scheduling a low-stakes, introductory class meeting in Zoom with the sole purpose of having all of your students log in and troubleshoot the four most common technical issues: students unable to see or be seen, students unable to hear, students who cannot be heard or students’ microphones picking up background noise or causing an echo. These guides should help:
- My Video/Camera Isn't Working
- Testing computer or device audio
- Attendee Controls in a Meeting (including mute and unmute)
- Audio Echo In A Meeting
-
Teach your students how to use Zoom as students.
Chances are most of your students have used video chat software like Facetime, Google Duo, WhatsApp, Hangouts and whatever Microsoft is calling Skype these days to communicate with friends and loved ones. That’s different than using web conferencing for scholarly purposes. Do not assume that your students know how to use or learn in Zoom. You will have to teach them. In particular:
- Give your students a tour of the Zoom interface during your first class session and teach them how to mute and unmute themselves. Remember: This may be the first time your students have ever used Zoom.
- Determine if you are going to require your students to have their web cameras on during your entire class or if you are going to allow them to turn them off and set that as a class rule during your first Zoom meeting.
- Remind your students about the importance of being mindful about what is happening behind them when their web cameras are on.
- Show students how you want them to get your attention. In small classes, some professors ask students to raise their hands on their web cameras. Others ask students to unmute themselves and simply chime in.
- Demonstrate to your students that to maintain eye contact in Zoom they should look at their web cameras, not their screens.
Frequently Asked Questions and Support
- Additional information about Zoom
- For other questions or support requests, please contact Media Technology Services.