Moving, Renaming, or Copying an Asset
Moving an Asset
All assets can be moved to other folders within your site. Moving an asset will change the folder in which it resides and it will also change its URL.
Moving a page without a redirect will break the URL and cause website visitors to see a broken link. Please contact cmshelp@brandeis.edu before you move the assets so we can help you avoid broken links.
-
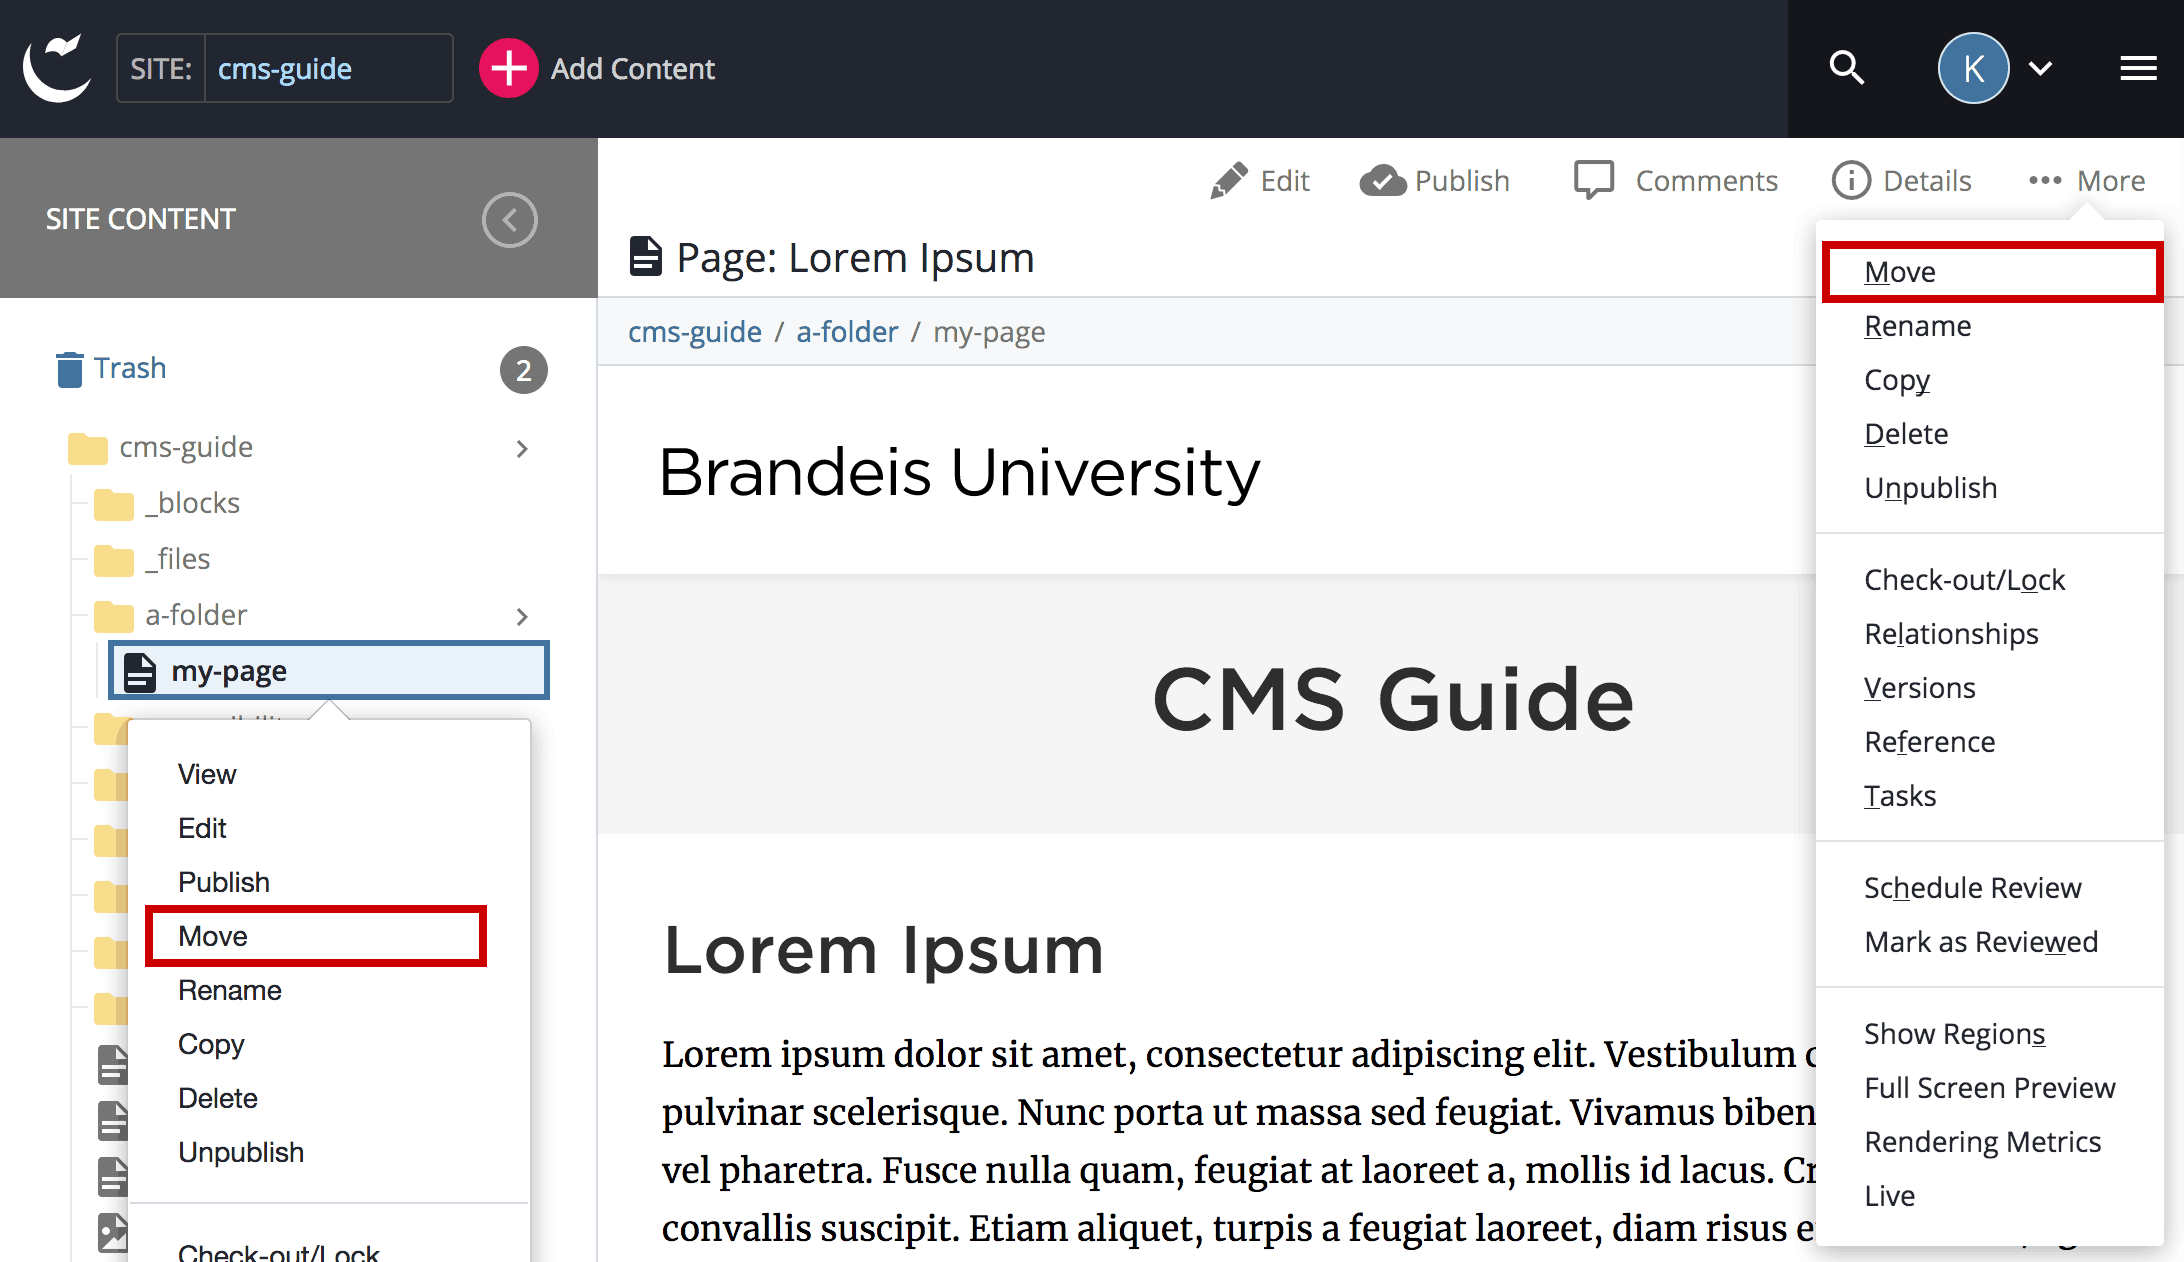
To move an asset, right-click the asset in the Site Content menu and click Move. Or, select Move from the More menu.
-
To choose a new location, click in the New Folder field which appears, and use the Chooser Panel to select your destination (as above). Then click the Move button in the upper right.

-
NOTE: Alternatively, you may simply drag and drop the asset in the Site Content menu. After dragging the asset, the move dialog box appears. Confirm that the asset is where you want it in the New folder box. Then click the blue Move button in the upper right.
- A small dialog box will briefly appear at the bottom of the screen:

Note: You may need to refresh the page to see the asset in the new location.
Renaming an Asset
While assets can be renamed, that does not mean that they should. Assets should only be renamed if the existing name contains an error.
Note: Renaming an asset will change its URL — which means the previous page URL will be broken. Please contact cmshelp@brandeis.edu before you rename assets so we can help you avoid broken links.
-
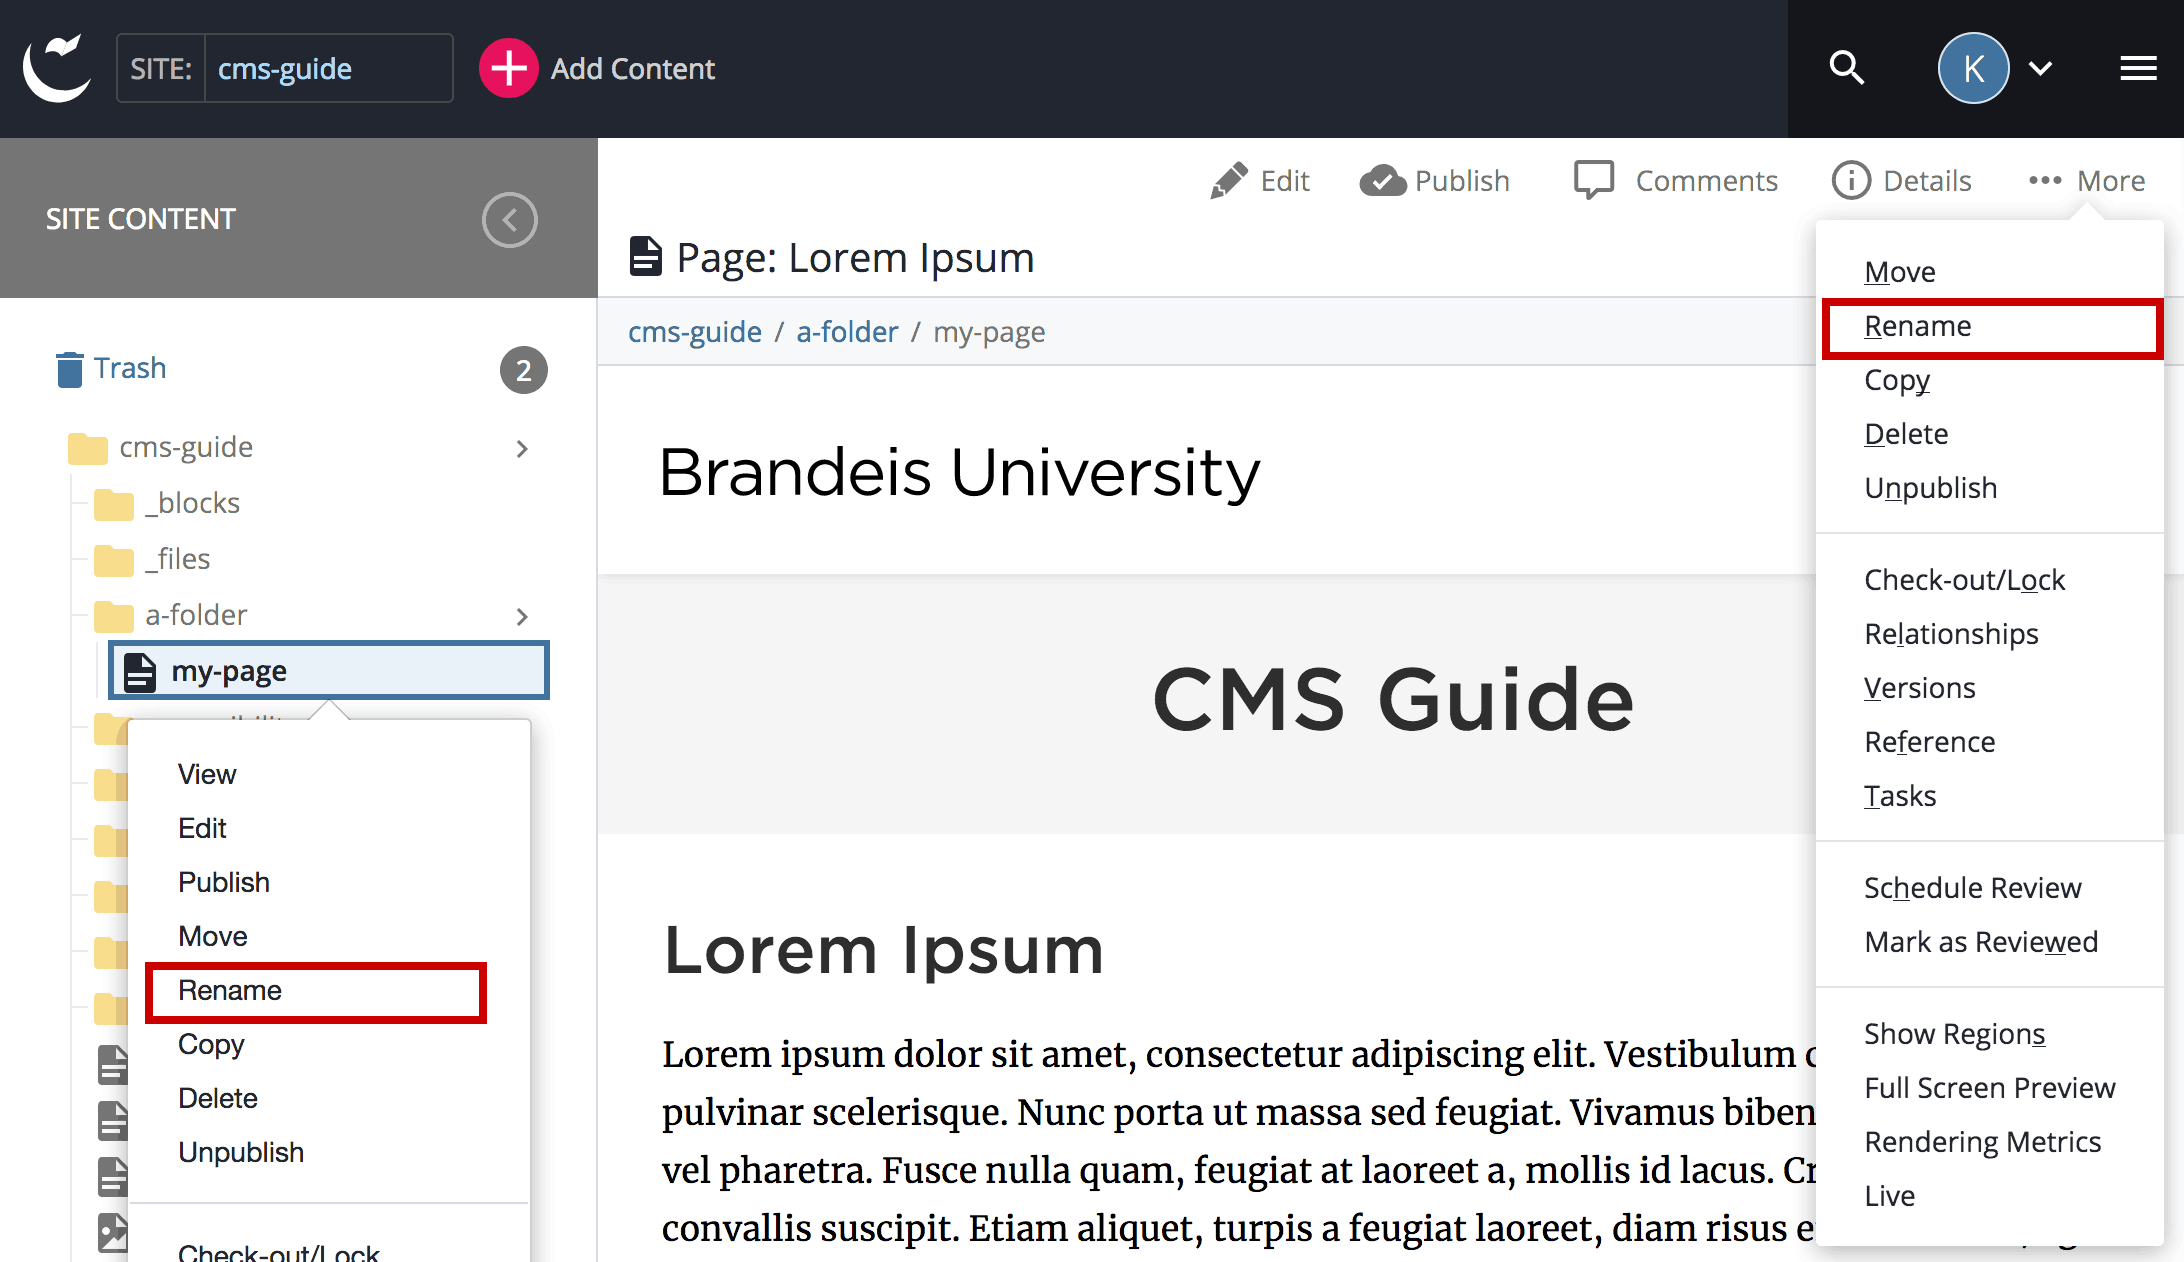
To rename an asset, right-click the asset in the Site Content menu and click Rename. Or, select Rename from the More menu.
-
To rename a page, enter a new name under New Page Name. Then click the blue Rename button at upper right.

Best Practice: Keep page names short; use only lowercase letters, numbers, and hyphens. Do not use spaces or underscores.
- A small dialog box will briefly appear at the bottom of the screen:

Note: You may need to refresh the page to see the asset's new name.
Copying an Asset
Instead of creating a new page, you may want to make a copy of an existing page that already includes your preferred page formatting and/or content types. You can also copy folders and files. When you copy a page, you must give it a new name, and you may choose a new location for it.
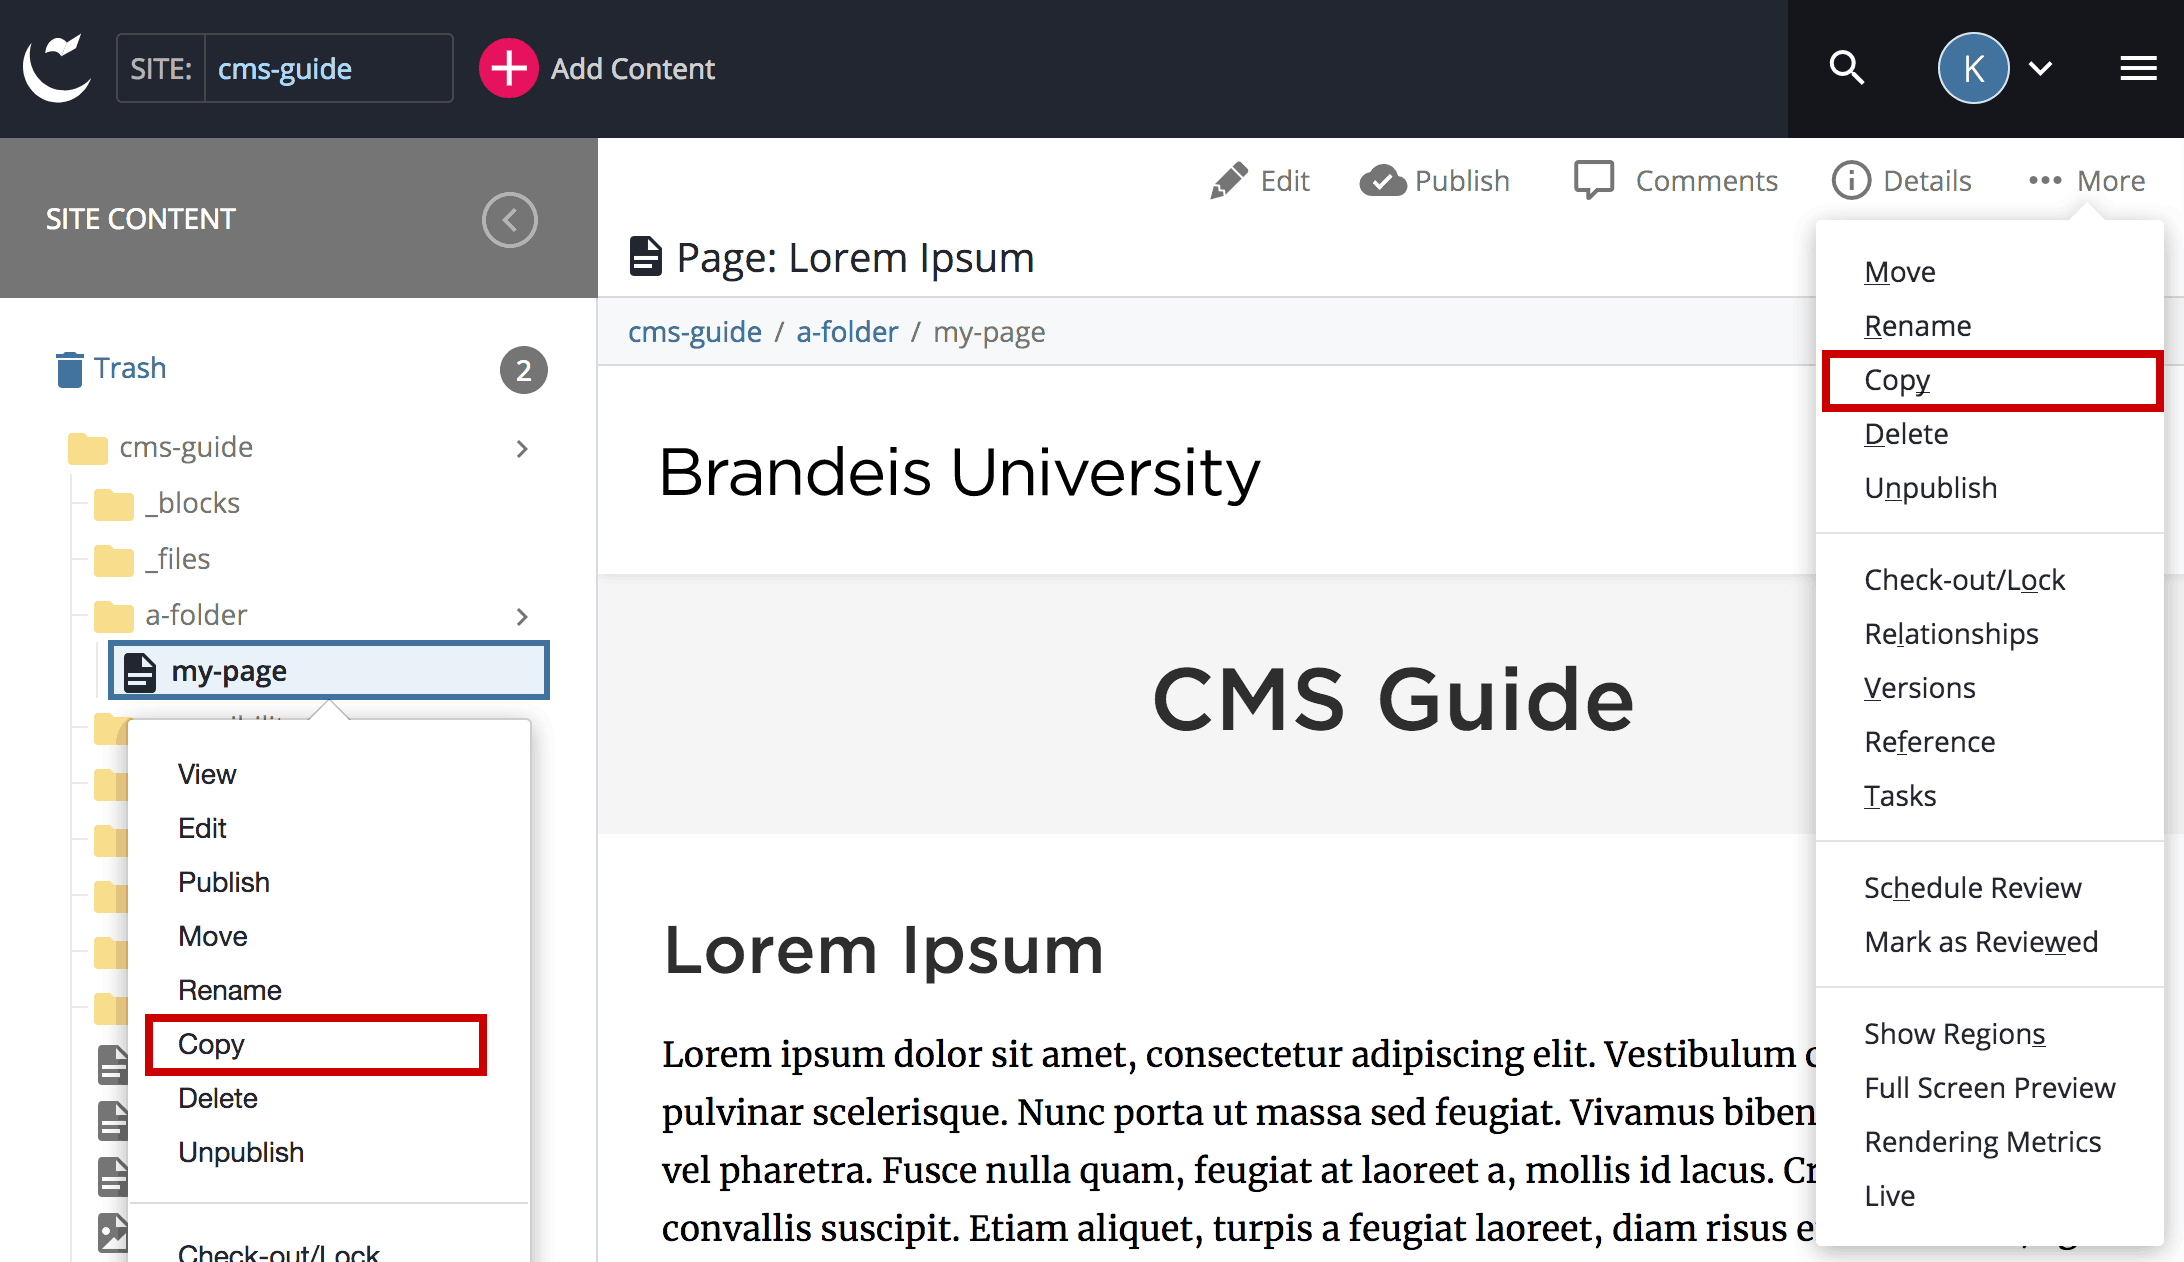
- Select the asset you wish to copy in the Navigation Panel. Right-click on the asset in the Navigation Panel and choose Copy, or choose Copy from the More menu.
- Enter a New Page Name for the copied asset.
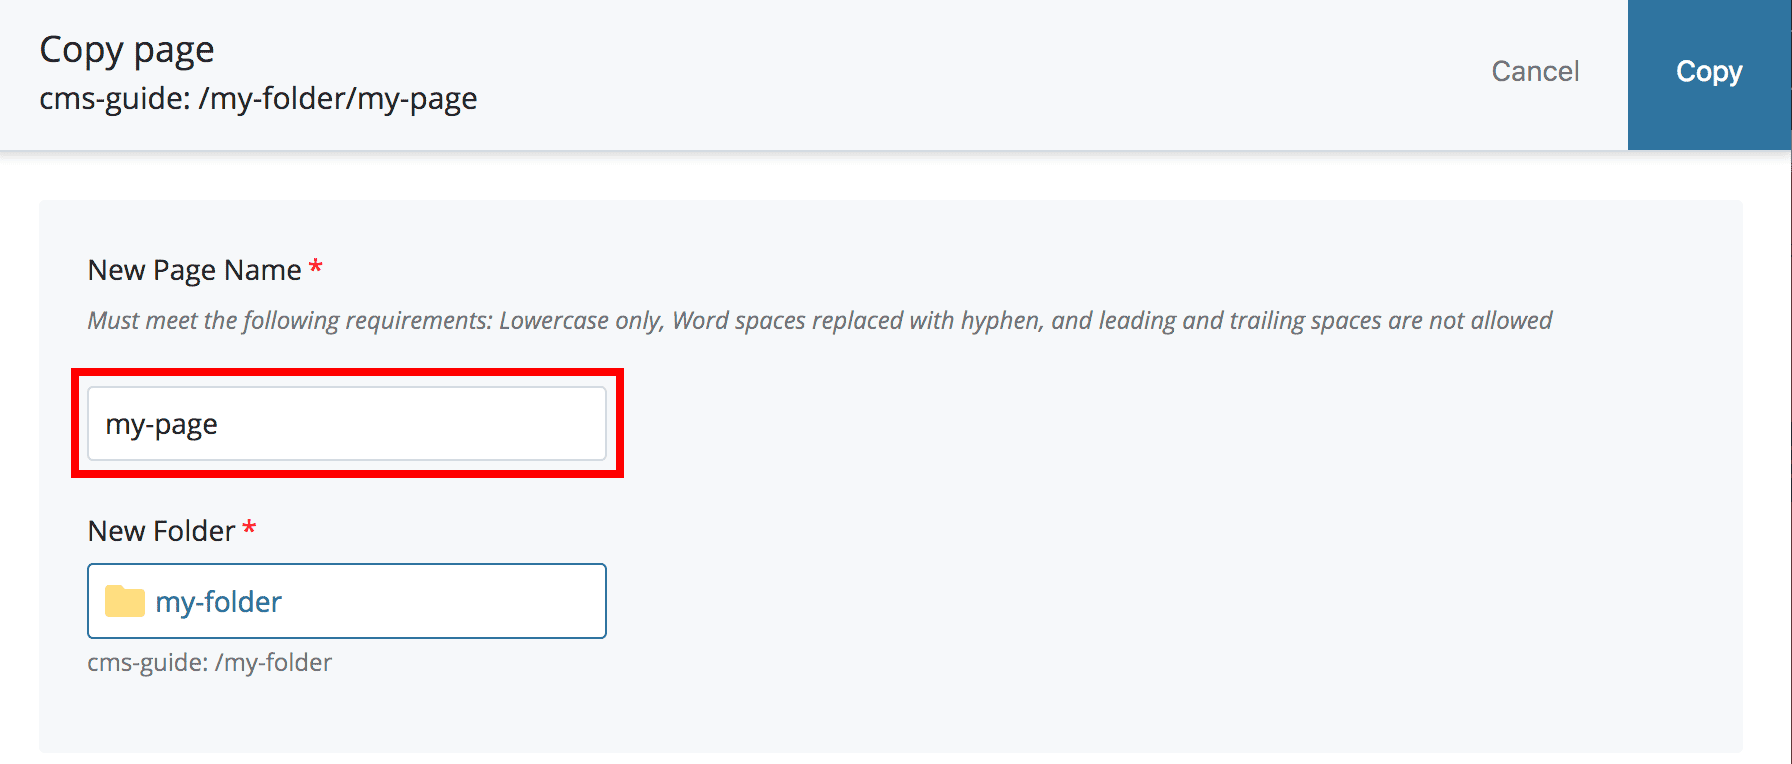
Best Practice: Keep names short; use only lowercase letters, numbers, and dashes. Do not use spaces or underscores.
- To copy the asset to a different folder:
- Below where it says New Folder click the name of the folder to open the Chooser Panel.
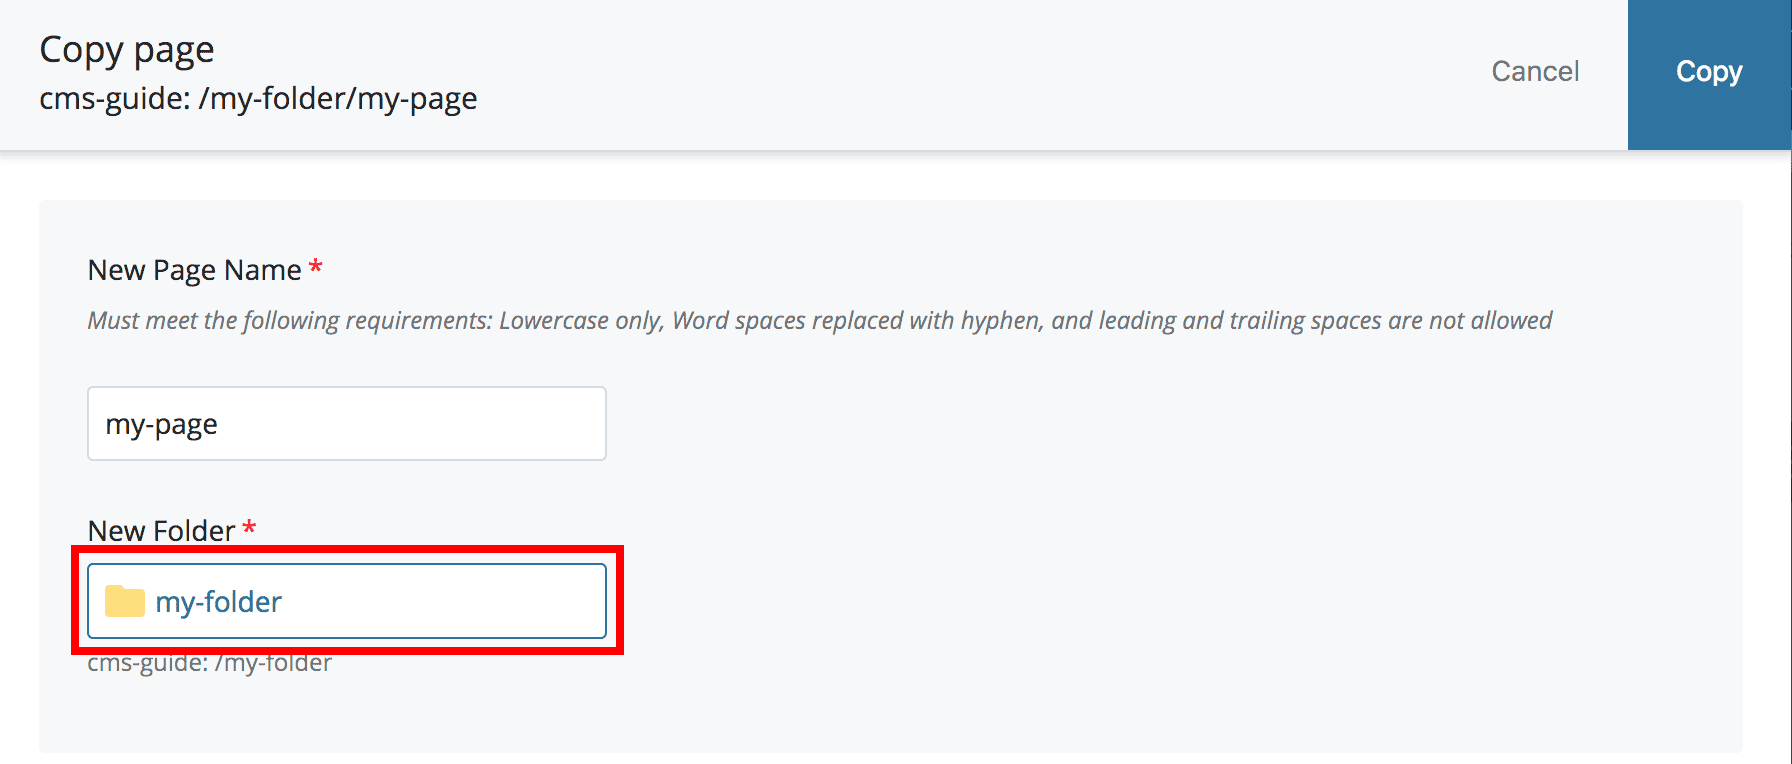
- The Chooser Panel will open on the right side. You will see a list of recent folders, or you can Browse the site tree. Select the folder in which you wish to place the copy. Click the Choose button in the upper right. Read more about the Chooser Panel.
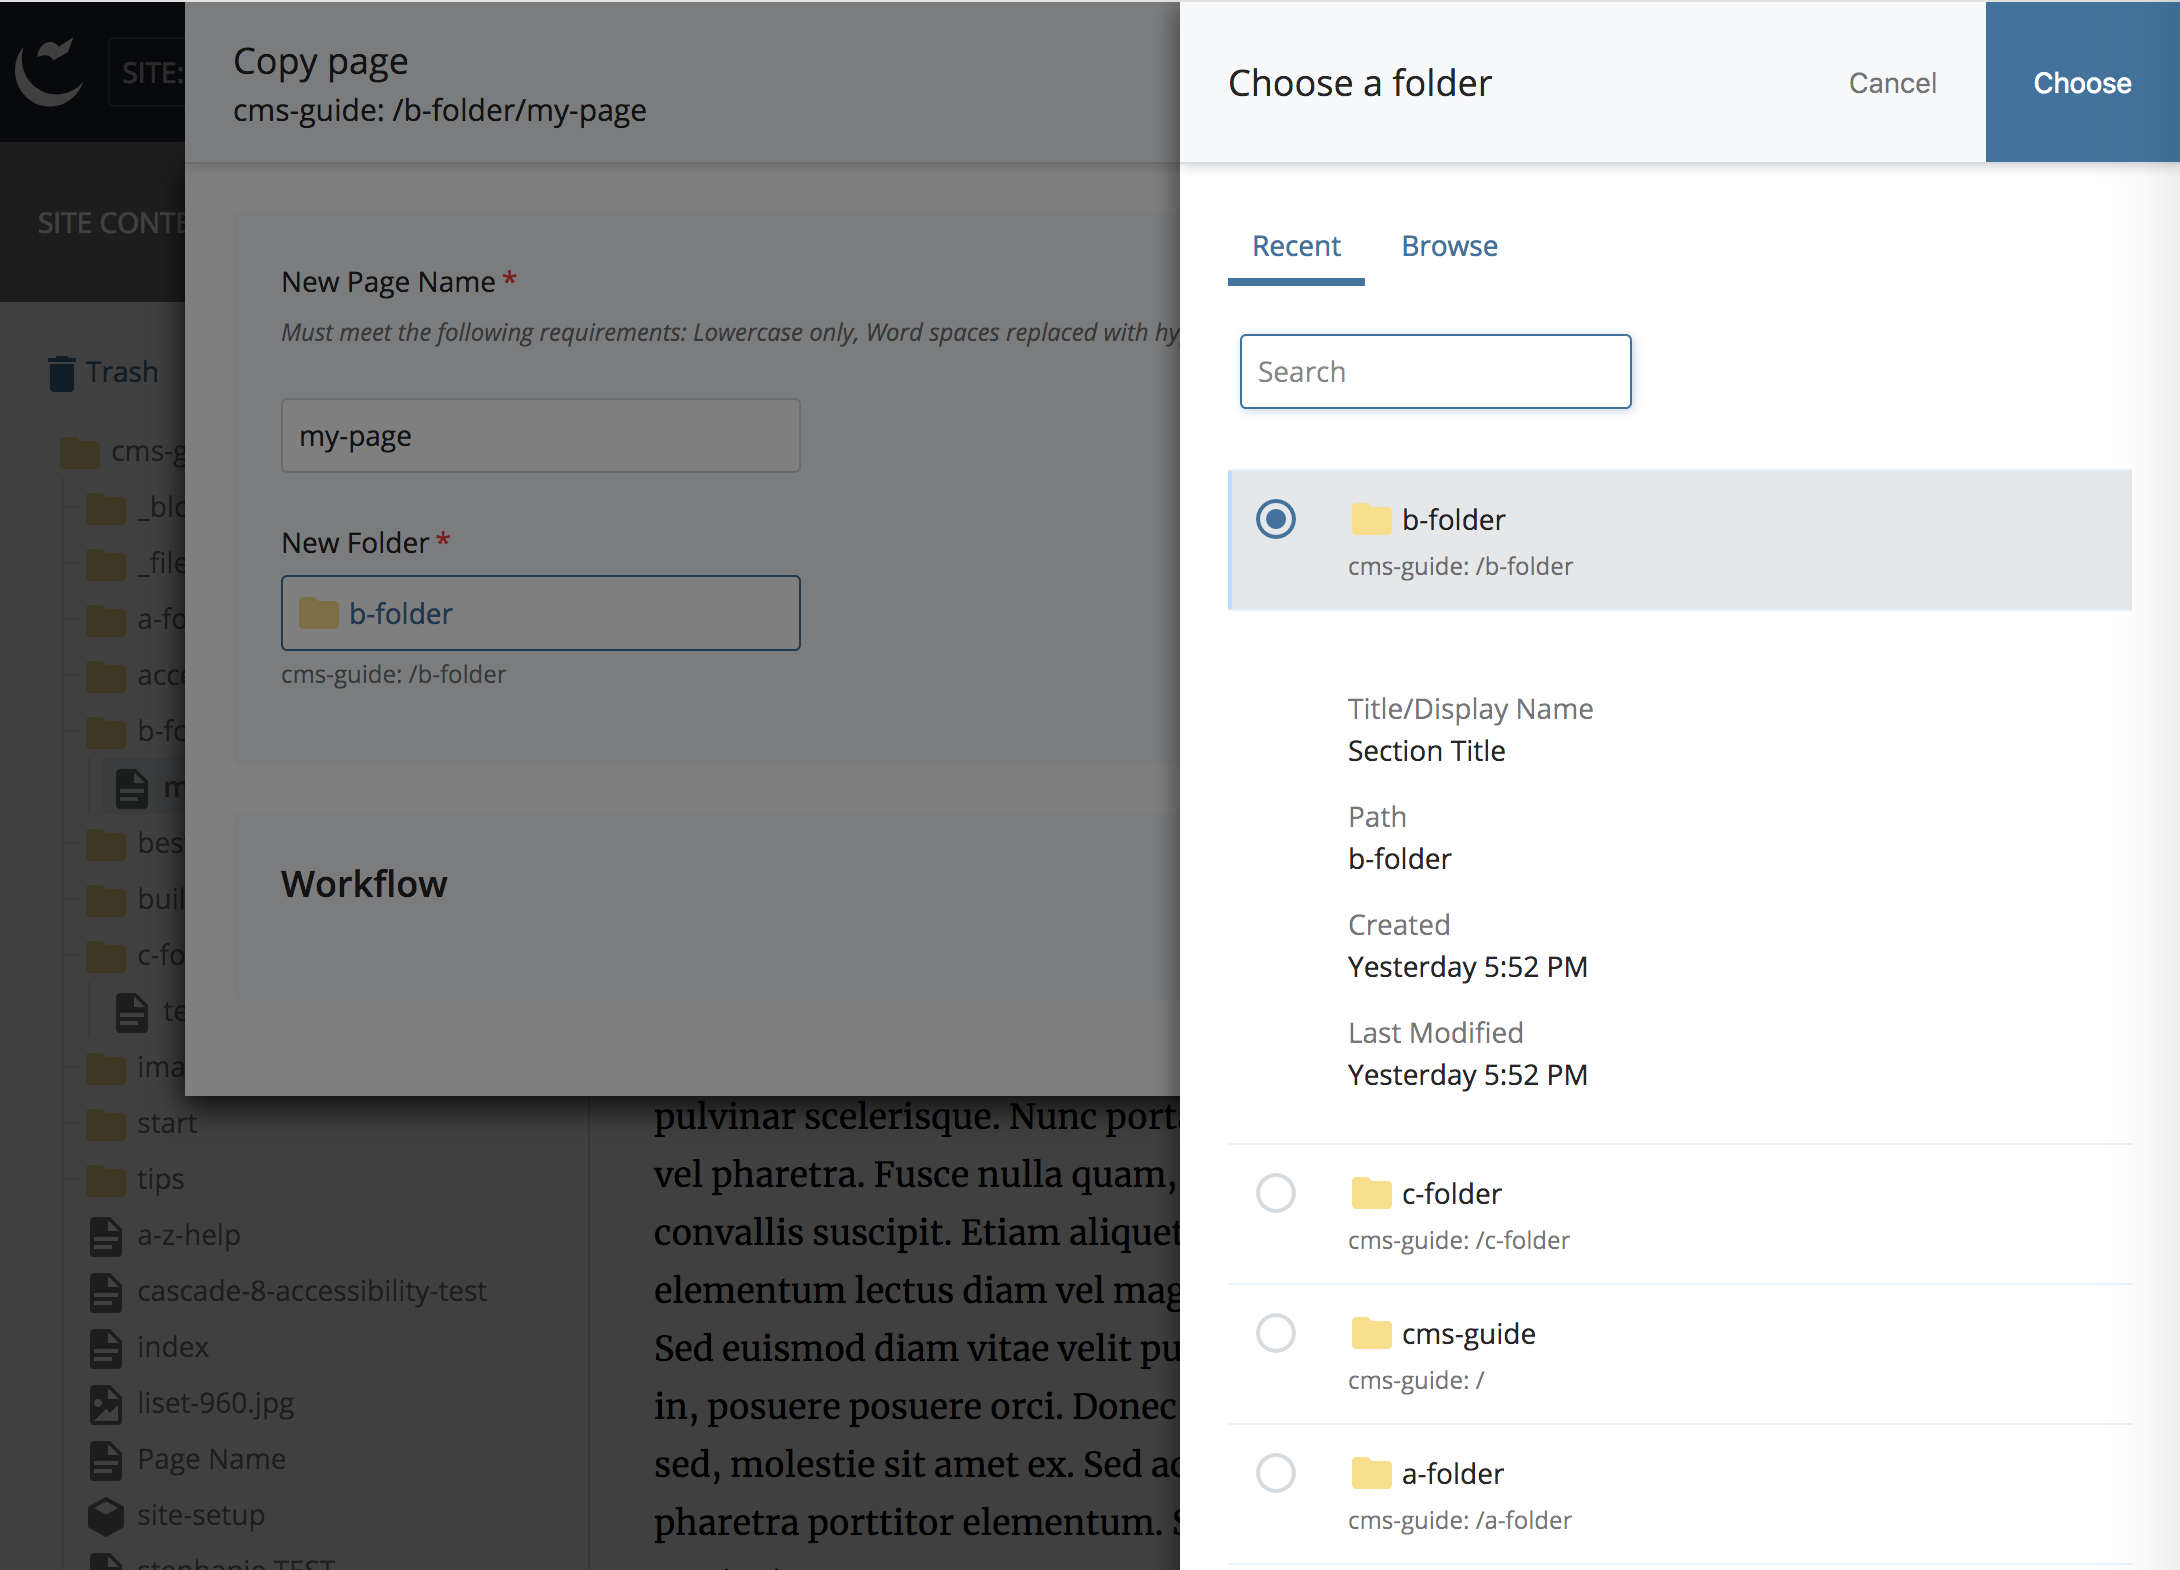
- Below where it says New Folder click the name of the folder to open the Chooser Panel.
- When the page is successfully copied, you will see a brief, small confirmation message at the bottom of the screen:

Note: You may need to refresh your browser window to see the page in its new location in the tree.
- Getting Started
-
Building and Editing
-
Building and Editing Basics
- Creating a New Page
- Submitting an Asset
- Inserting and Formatting Text
- Formatting Options: The “Formats” Menu
- Inserting Links
- Inserting Anchors
- Adding and Editing Folders
- Uploading and Updating Files
- Editing an Existing Page
- Creating a Mirror Page
- External Link Assets
- Creating a Transcript Page
- Moving, Renaming, or Copying an Asset
- Publishing and Un-publishing
- Deleting and the Trash
- Viewing and Restoring Versions
- Updating Your Site's Navigation
- The Chooser Panel
- Content Types
- Images and Multimedia
-
Building and Editing Basics
- Accessibility
- Best Practices
- Frequently Asked Questions
- A-Z Help List
- Home