Tables
(See a sample table on the bottom of this page.)
A table is a way to organize data (numerical or not) into rows and columns. Tables must be created in their own Table content type for three reasons:
- Accessibility: For someone using a screen reader, information in a table is read in a specific way, so we want our table data to be constructed appropriately.
- Formatting: Tables in the Brandeis templates have specific styling; header rows are formatted with a blue background and bold, white text; regular rows alternate between white and beige background colors.
- Responsiveness: Tables created using the Table content type are responsive, meaning they are optimized for viewing on any device, which may include horizontal scrolling.
Creating tables using the Table content type ensures the table formatting is applied correctly.
Please Note: Tables should only be used for data (numerical or not). They should not be used for aligning photos or text. This is an outdated practice and is not accessibility-friendly.
Creating a new table
- Find the page you want to add the table to and click Edit.
- In the Content editor, select Table from the drop-down menu.
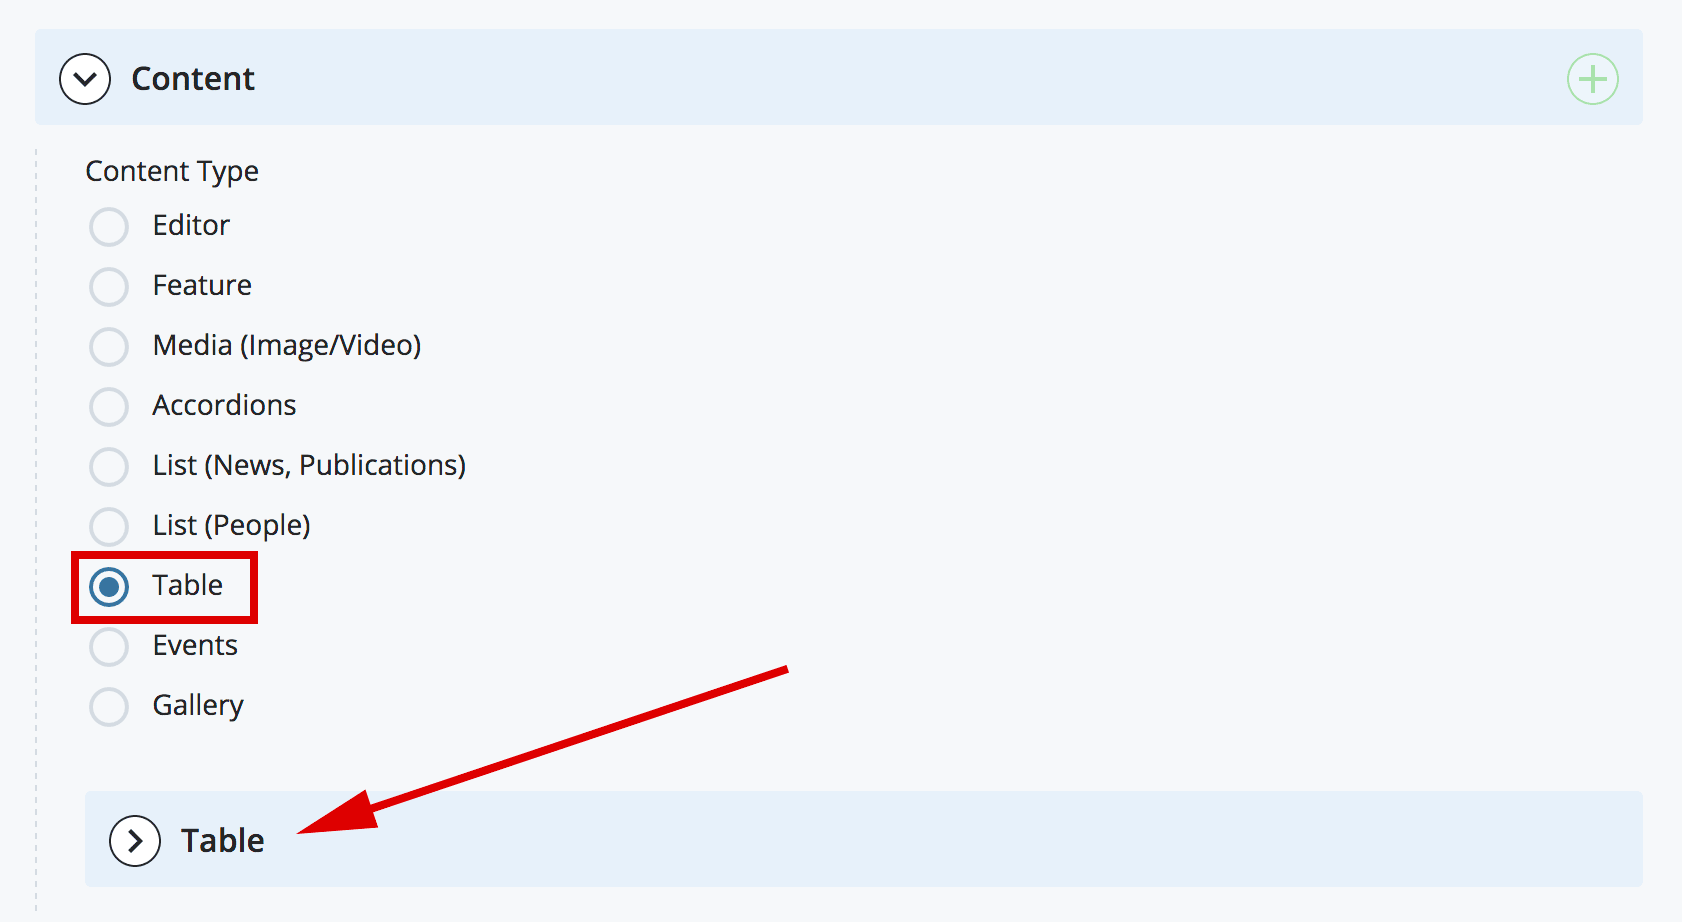
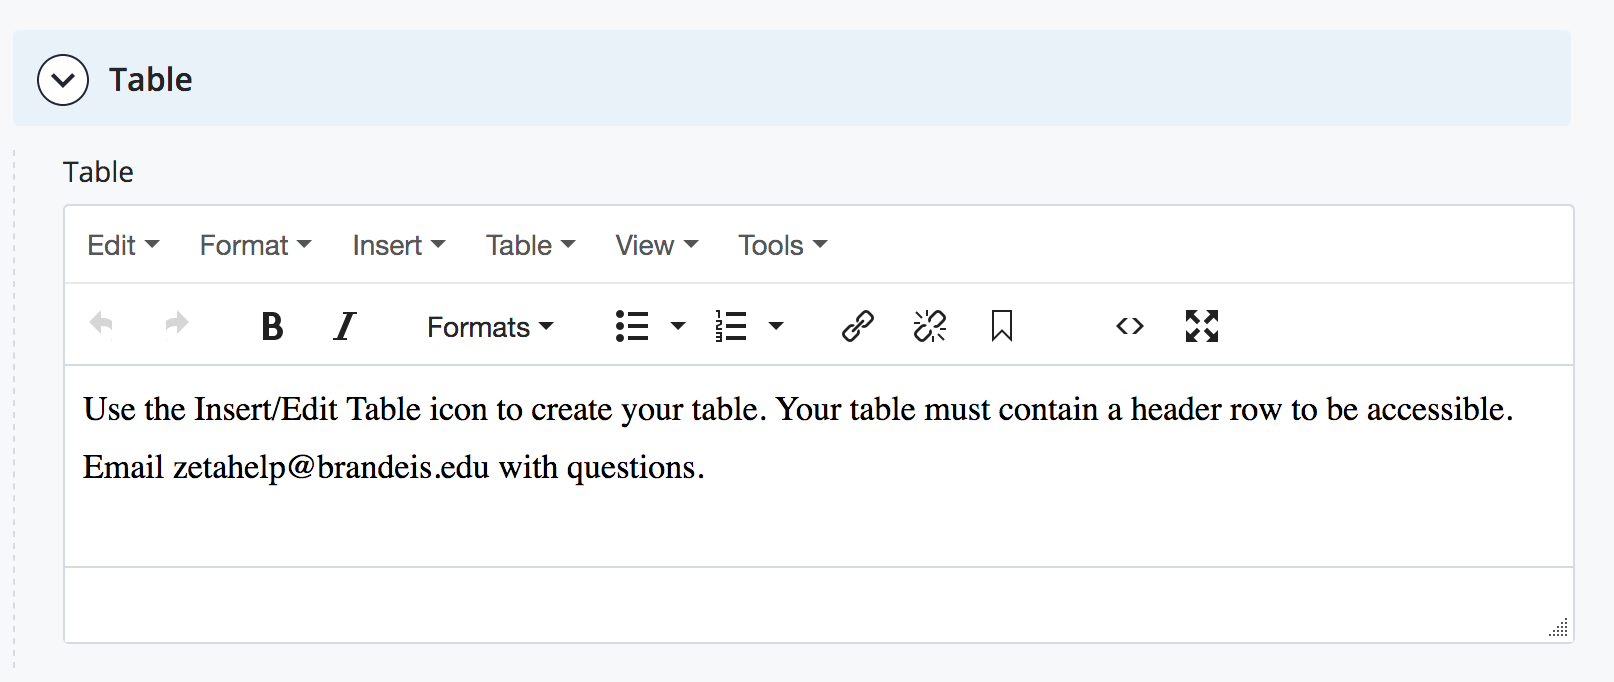
Note: The Table content type looks just very similar to a regular WYSIWYG editor — but it's not! Please don't use the Editor content type for a Table; always use the Table content type. Also, please don’t include any text other than the table in the Table content type; add an Editor when necessary.
The default text in the Table content type is for your reference. Once you have read it, delete it before adding your table.
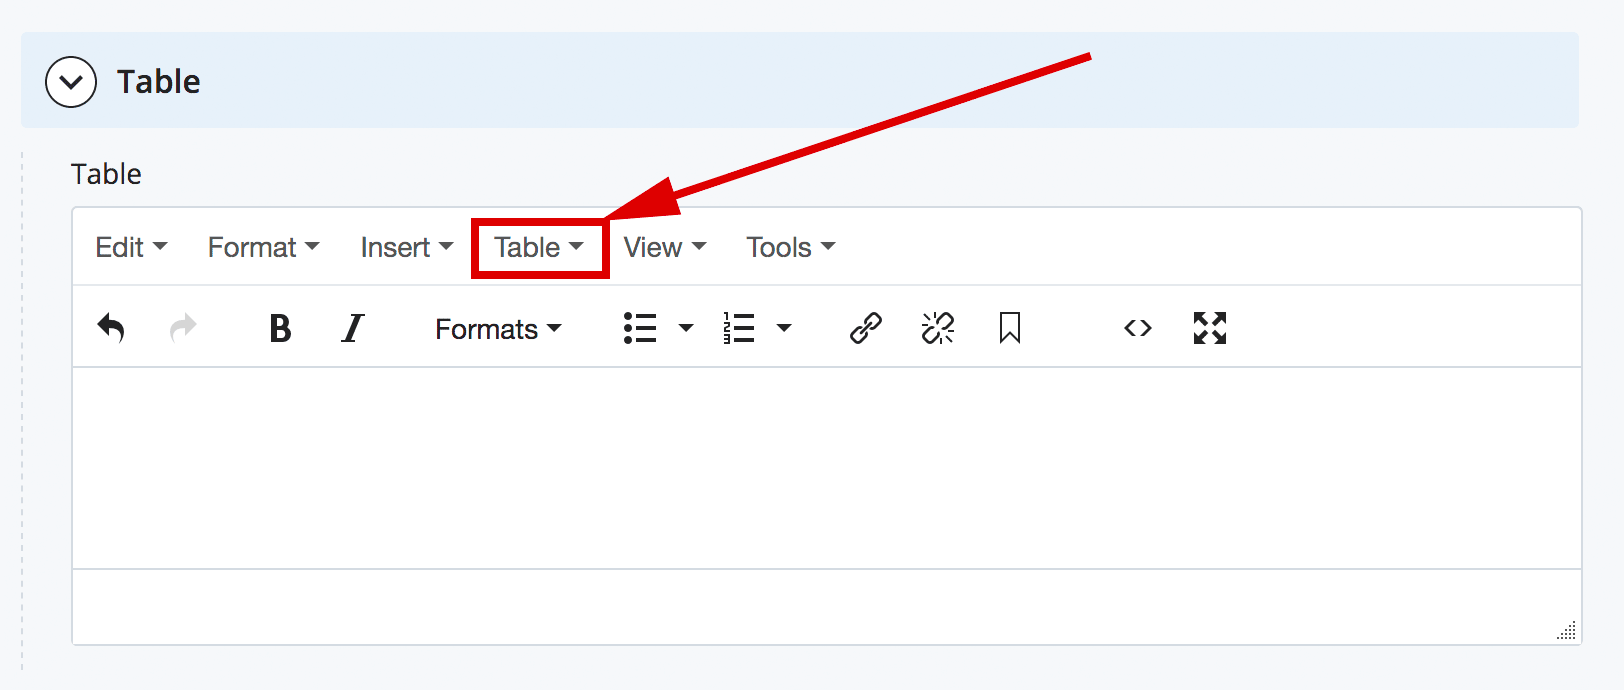
Click on the Table menu.
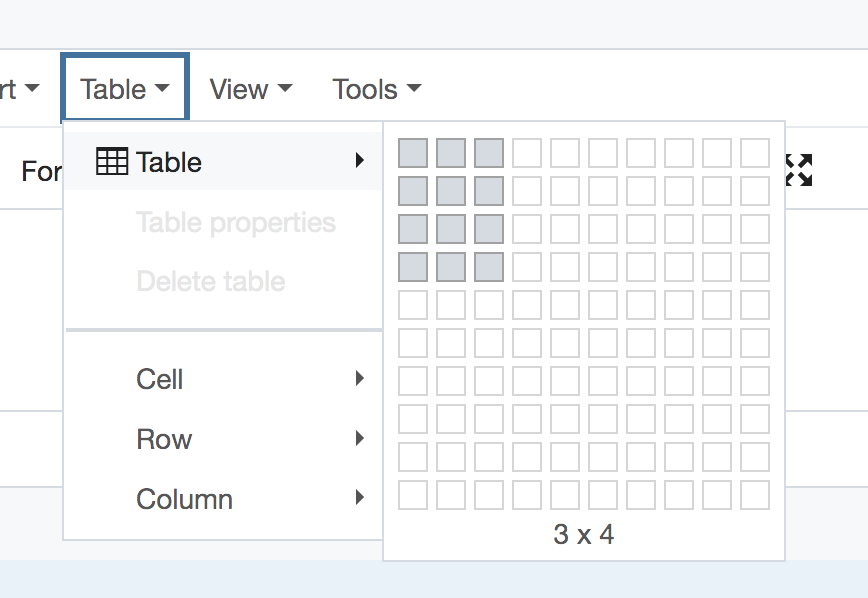
With the Table menu open, select the number of rows and columns you will need for your table. Make sure to account for a row for a header (mandatory for accessibility).
For example, if you want a table with three columns and four rows (one being a header), it would look like this:
Note the icons at the bottom of your table. These will allow you to add or delete columns and rows.
![]()
Populate the table with your text by typing it in or copying/pasting text from a plain text editor.
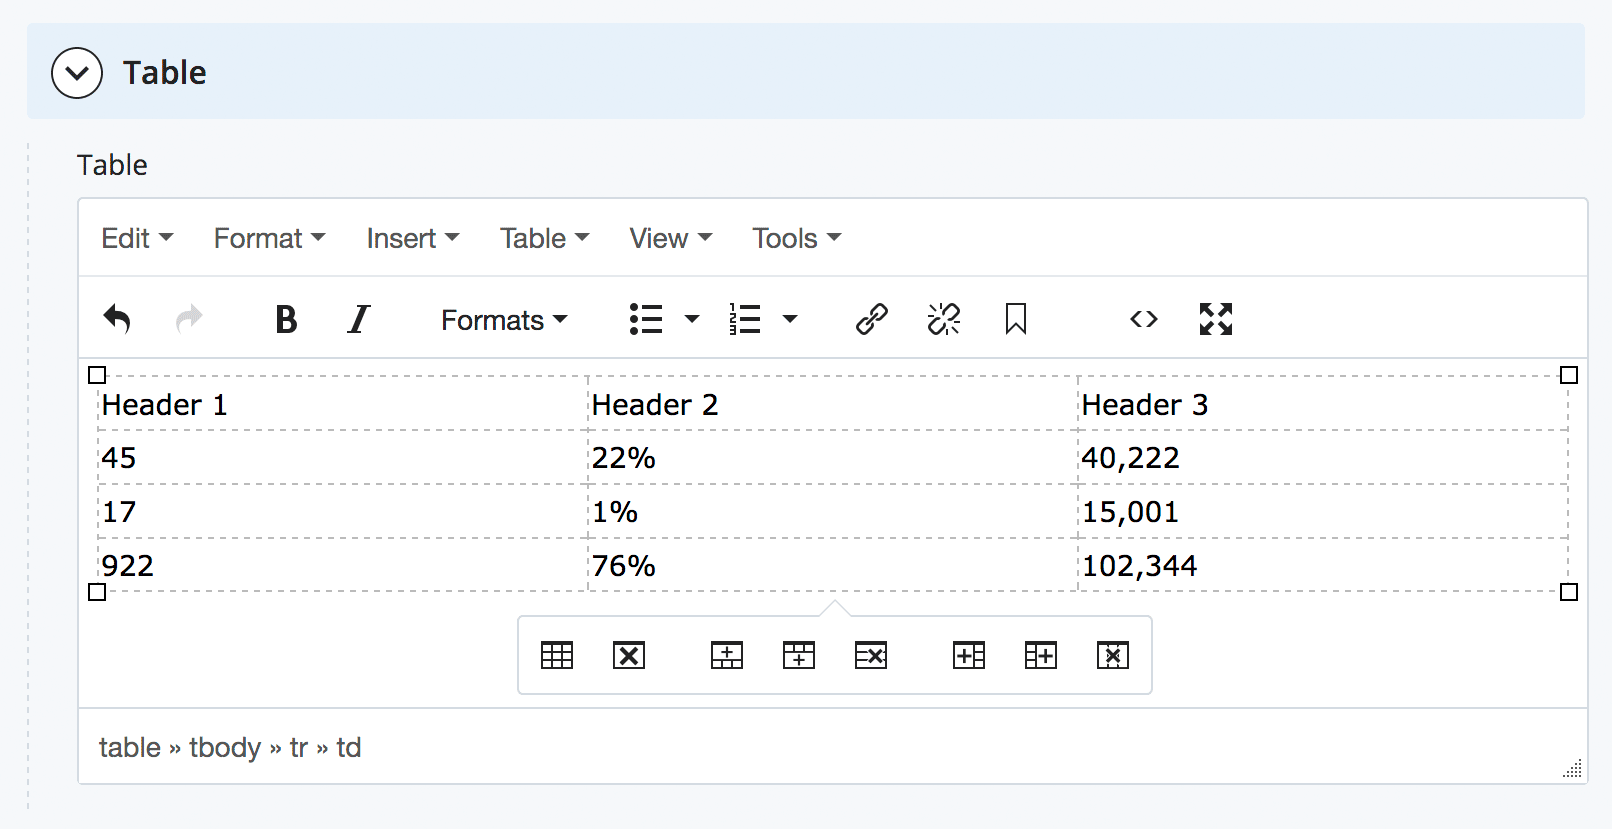
Once your text is in your table, you must format your header row.
Formatting your header row
Select all the cells in your header row. This is easily done by clicking in a cell and dragging your cursor. Selected table cells will turn blue.
Click the Table menu, then Cell, then Cell Properties.
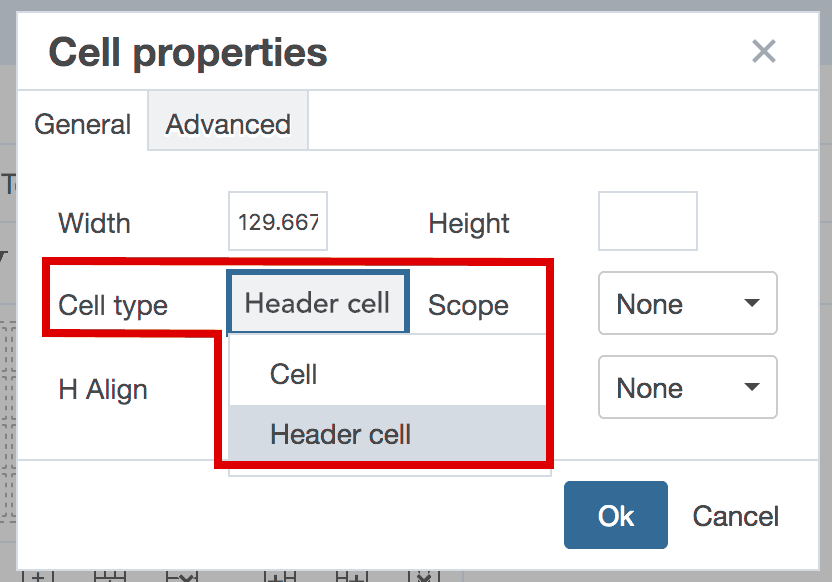
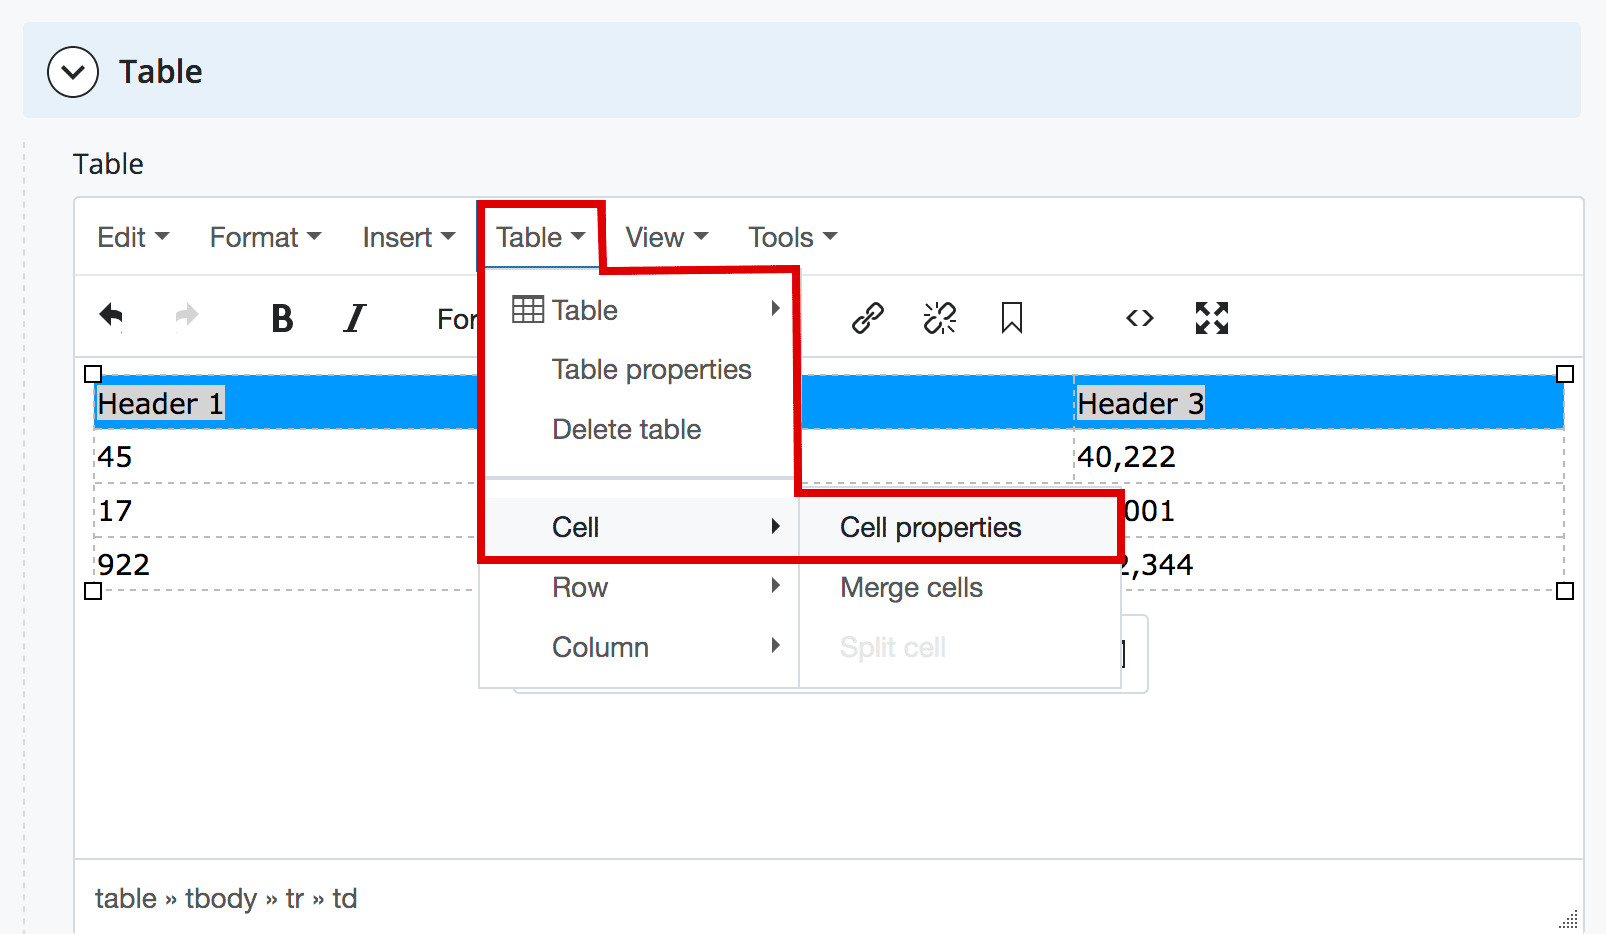 The Table Cell Properties window will pop up. There are two steps you must complete in this window.
1. Cell Type: Select Header cell from the dropdown.
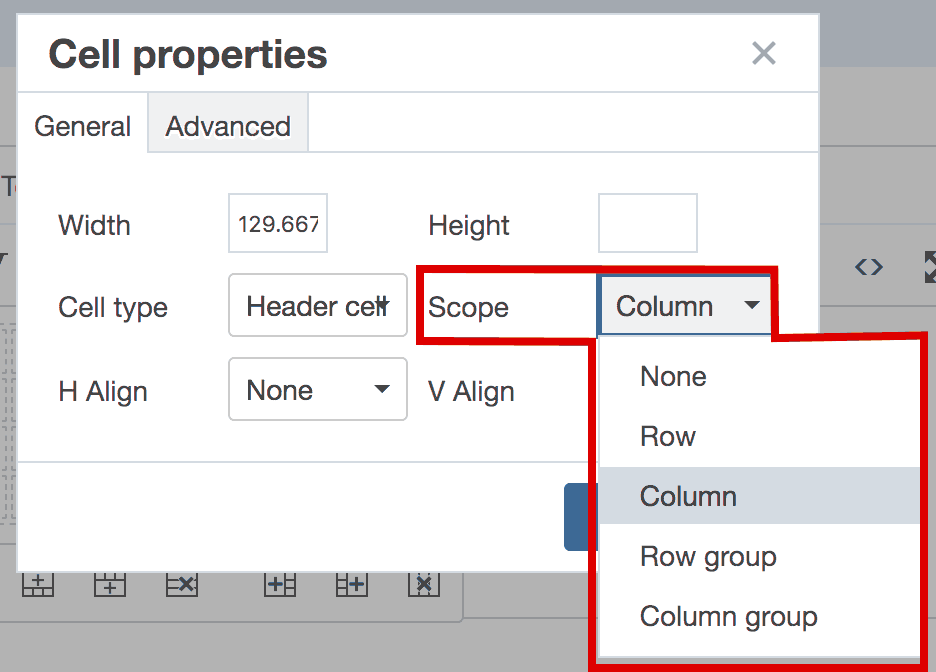
2. Scope: Select Column from the dropdown.
Once these selections have been made, click Ok.
In your Table content type, you will see that the appearance of the header row text has changed.
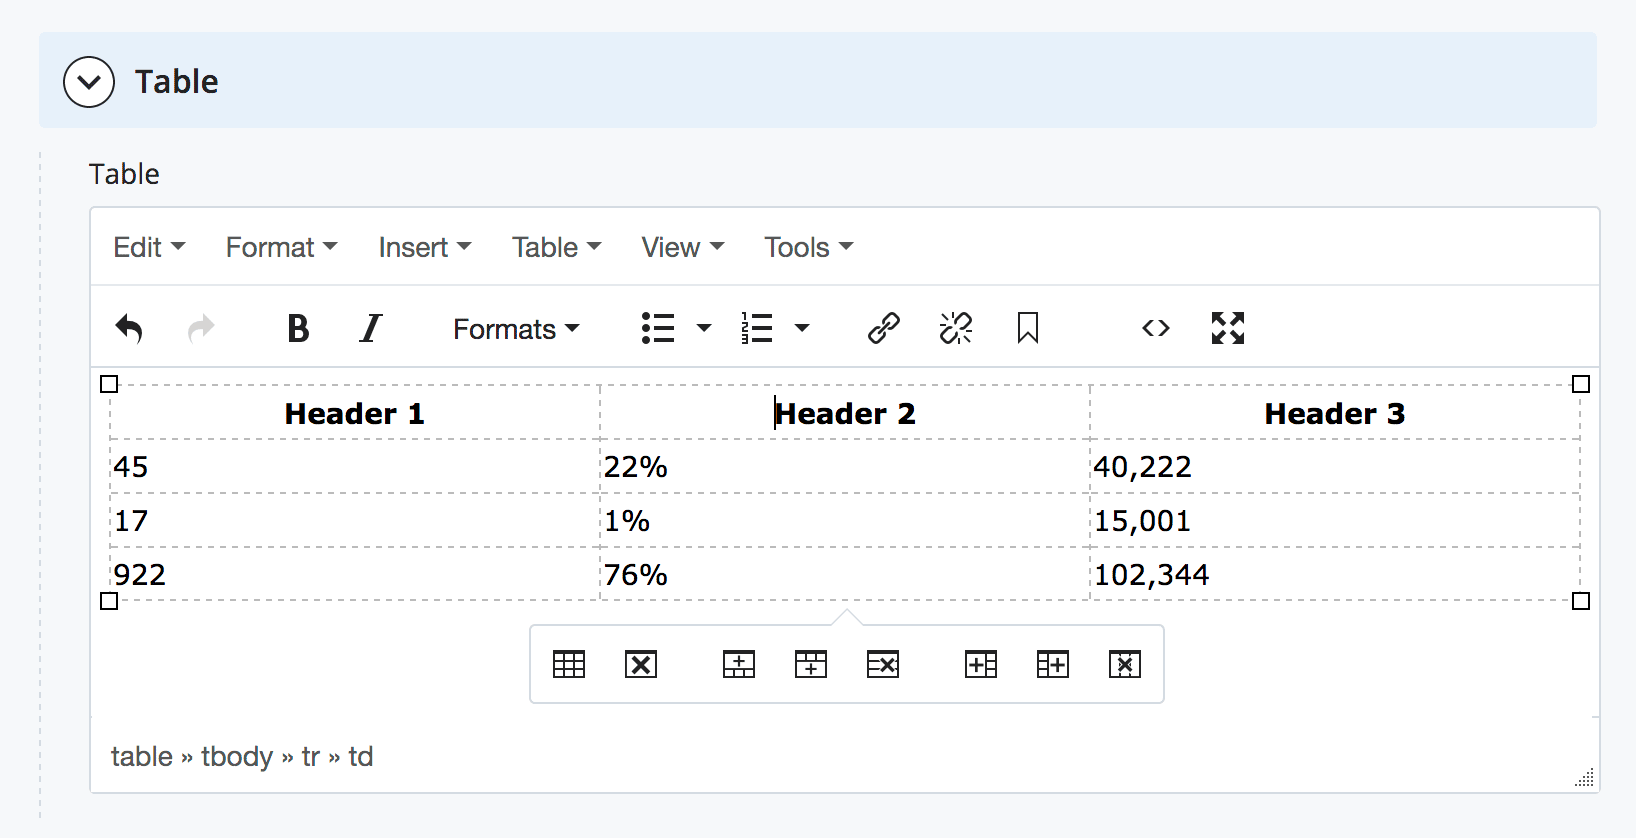
Once you are finished, submit. You will then see your entire formatted table. It should look like the table below with a blue header row and alternating beige and white rows.
Editing an Existing Table
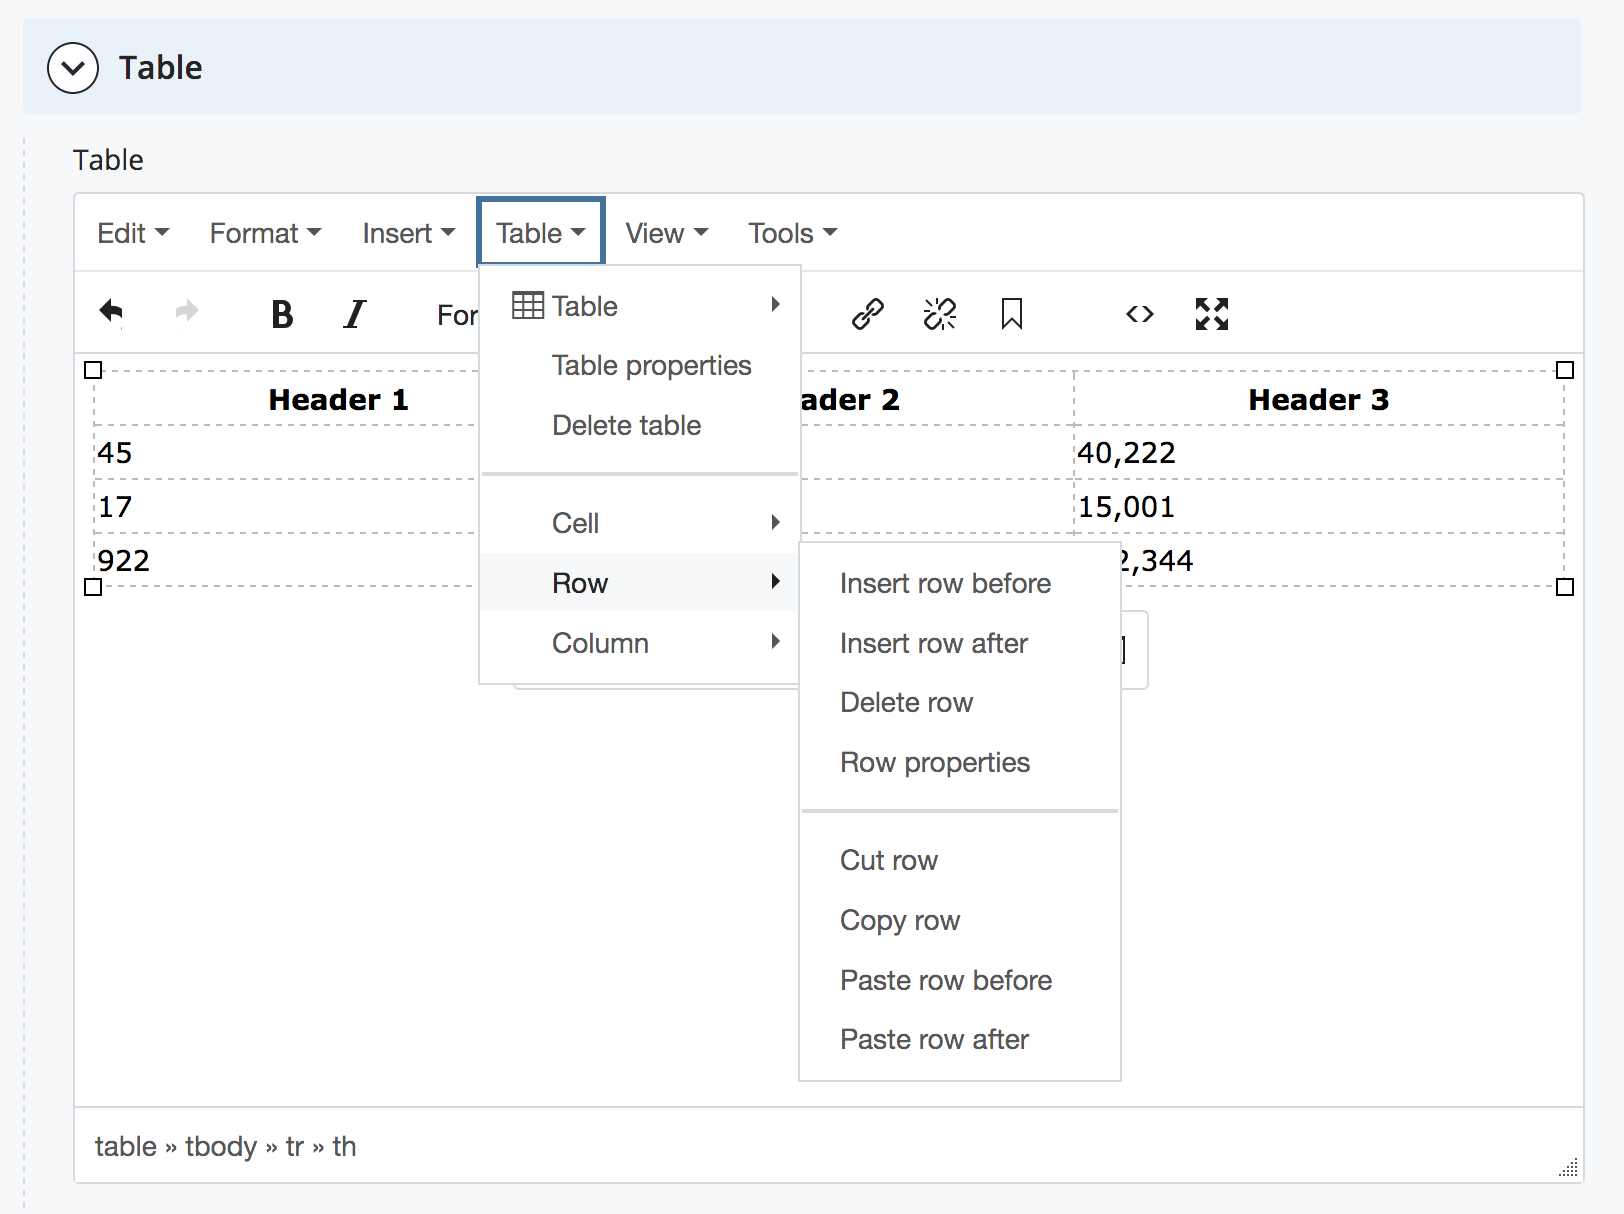
To modify the structure or format of an existing table, highlight text in a cell in the table and then right click or click within a cell and use the icons at the bottom of the table. You will see options to add or delete rows or columns. There are also a number of table functions (merging cells, deleting the entire table, etc.) available when you click a cell within the table.
Sample Table
| Header 1 | Header 2 | Header 3 |
|---|---|---|
| 45 | 22% | 40,222 |
| 17 | 1% | 15,001 |
| 922 | 76% | 102,344 |