Image Sizing and Editing
The Brandeis website supports the use of high-quality photography. Here are all the details to ensure your images look their best.
Image Sizes
It is important that images used on your website are resized to the appropriate dimensions before you upload them to the CMS.
Full sized images (e.g., those taken directly from a device without resizing) slow down the load time of your web pages, and can be frustrating for website visitors.
how to crop an image in photoshop
Photoshop
Adobe Photoshop is the recommended tool for cropping and resizing images. Photoshop can be downloaded from the ITS website as part of the Adobe Creative Cloud suite of products.
Note: Adobe Creative Cloud is free for faculty and staff using university-owned computers.
Image Size References
Below is a list of the image sizes (in pixels) used throughout the Brandeis website.
Images that appear at the top of your site's home page.
Full width image: 1920 x 768 pixels
Feature (photo with text summary on side): 960 x 640 pixels
Slideshow (side-by-side images a user can scroll through): 960 x 640 pixels
When adding your RSS Feed to your webpage, you can add an image to display with the blog post. This is a static image; it does not update each time a new blog is posted.
Size: 735 x 490 pixels
Size: 510 x 340 pixels
Feature images appear in either the Feature content type in the main Content area, or the Feature or Featured Event content type in the Content Below Main area.
Size: 735 x 490 pixels
Full size image: Can vary; maximum width: 1920 pixels, maximum height: 1080 pixels
Vertical thumbnail: 300 x 400 pixels
Horizontal thumbnail: 480 x 320 pixels
Images in an Editor in the main content area where text wraps around them. All images should be aligned right using the styles dropdown.
Size: Can vary, but will scale with the column width/container. No larger than 1000 pixels wide.
When creating a list using the List (News, Publications) content type, you can add an image that is right aligned with the content.
Size: 735 x 490 pixels
Images in your main content area that are created in their own Media content type.
Large: 960 x 640 pixels
Small: 960 x 640 pixels
Note: The image sizes are the same pixel dimensions, but the small image will display at a size of 735 x 490 pixels.
News images appear in the News content type in the Content Below Main area.
Size: 480 x 320 pixels; must be horizontal
Sharable people blocks use square images used for headshots.
People block: 340 x 340 pixels
Sidebar images appear below your left navigation, either in an Editor or Sidebar Text with Photo Block.
Size (Sidebar Text with Photo Block): 960 x 640 pixels
Size (Editor): Can vary, but will scale with the column width/container. No larger than 1000 pixels wide.
Social media images are for Facebook sharing. If someone shares a link from your site to Facebook, the social media image you have selected will automatically load on Facebook. Note: Social media images are associated with a single page, not your whole site.
How to Crop an Image in Photoshop
Note: These instructions are for Photoshop CC 2014 and up. If you are using a different version of Photoshop, you may need to follow slightly different instructions. Many tutorials can be found online.
-
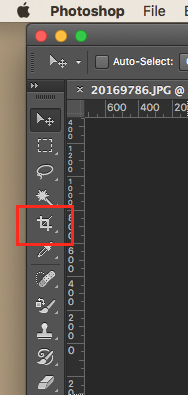
Open your photo in Photoshop. Click on the Crop tool on the vertical toolbar.

-
Make sure W x H is selected from the dropdown on the horizontal crop toolbar.

-
Enter a value for width and height in pixels (px is short for pixels). (Correct width and height for each content type can be found above.)

-
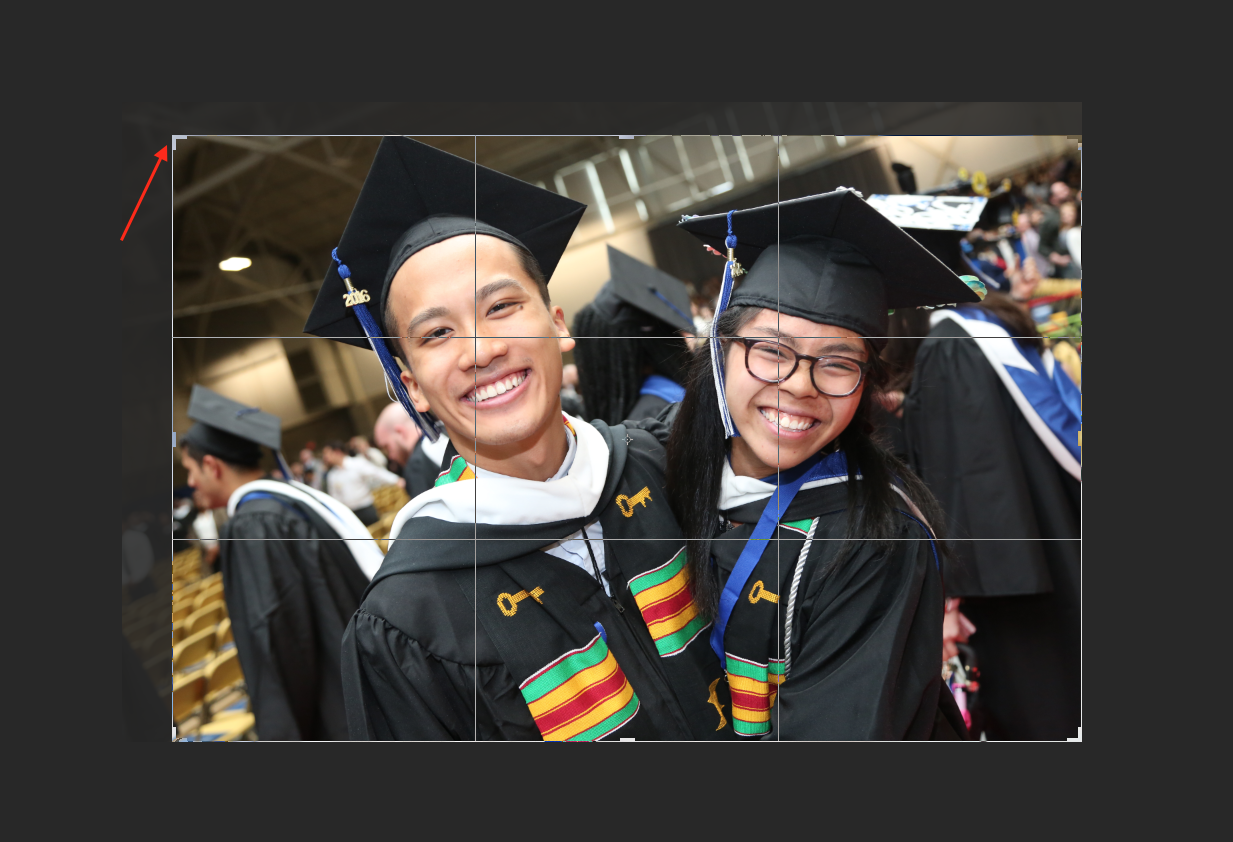
Drag the corner and edge handles of your photo to specify the crop boundaries. Your photo will be cropped proportionate to the width and height you have entered in the toolbar. Any part of the picture outside of the box will be deleted.

-
Once you are satisfied with your selection, click the checkmark on the toolbar to complete the crop.

-
Now that your photo is the correct pixel dimensions, you must optimize it for the web.
Optimizing an Image for the Web
In addition to saving images to exact pixel dimensions, they should also be saved — or optimized — for the web. When you optimize a photo, you are reducing the file size while preserving image quality.
Note: Actual image file sizes (in KB) will vary based on each individual photo’s complexity. For example, an image of a blue sky and clouds would be inherently smaller in file size than a photo of 10 people's smiling faces — there is simply less detail, and therefore data, in the photo.
Recommended Tools/Software for Optimizing Photos
If you are using Photoshop to resize your images, you can use its built-in tools to optimize your photo prior to uploading it to the CMS. We also recommend a web-based tool called Optimizilla.
- Instructions for Photoshop users.
- Instructions for the web-based tool, Optimizilla.com.
Note: If you have trouble saving/optimizing your photo for the web, email cmshelp@brandeis.edu.
Additional Information
Copyright
Web editors should only use images for which Brandeis holds the copyright (taken by a university photographer, a staff member, etc.) or stock images that they have purchased rights to use.
- You may download photos taken by university photographers from PhotoShelter.
- We recommend iStockphoto for stock photography needs.
Note: Images downloaded from either of these platforms must be resized.