Events
You can add events to your website so people can find out information about upcoming events. Generally, you want to add multiple events rather than single events.
Events can be added to the main content area (most appropriate if it is the primary information on the page), or to the Content Below Main section (can be incorporated on any page).
(See a sample of events added to the main content area below. Below that, you can see a sample of events added to the Content Below Main section.)
Watch: Adding Events to Your Website
- Find the page you want to add the Events to and click Edit.
- Determine where you want to add the list of events.
- To add events to the main content area of your website, in the Content editor, select Events from the drop-down menu > Events.
- To add events below your main Content area, make sure the Add Content Below Main box is checked off. Then in the Content Below Main editor, select Events from the drop-down menu and click > Events.
- Enter a Heading for your events. Suggestions: "Upcoming Events" or "Events Calendar"
There are four ways to add events.
Manual Entry
At least two events are required in order to use the Manual Entry method.
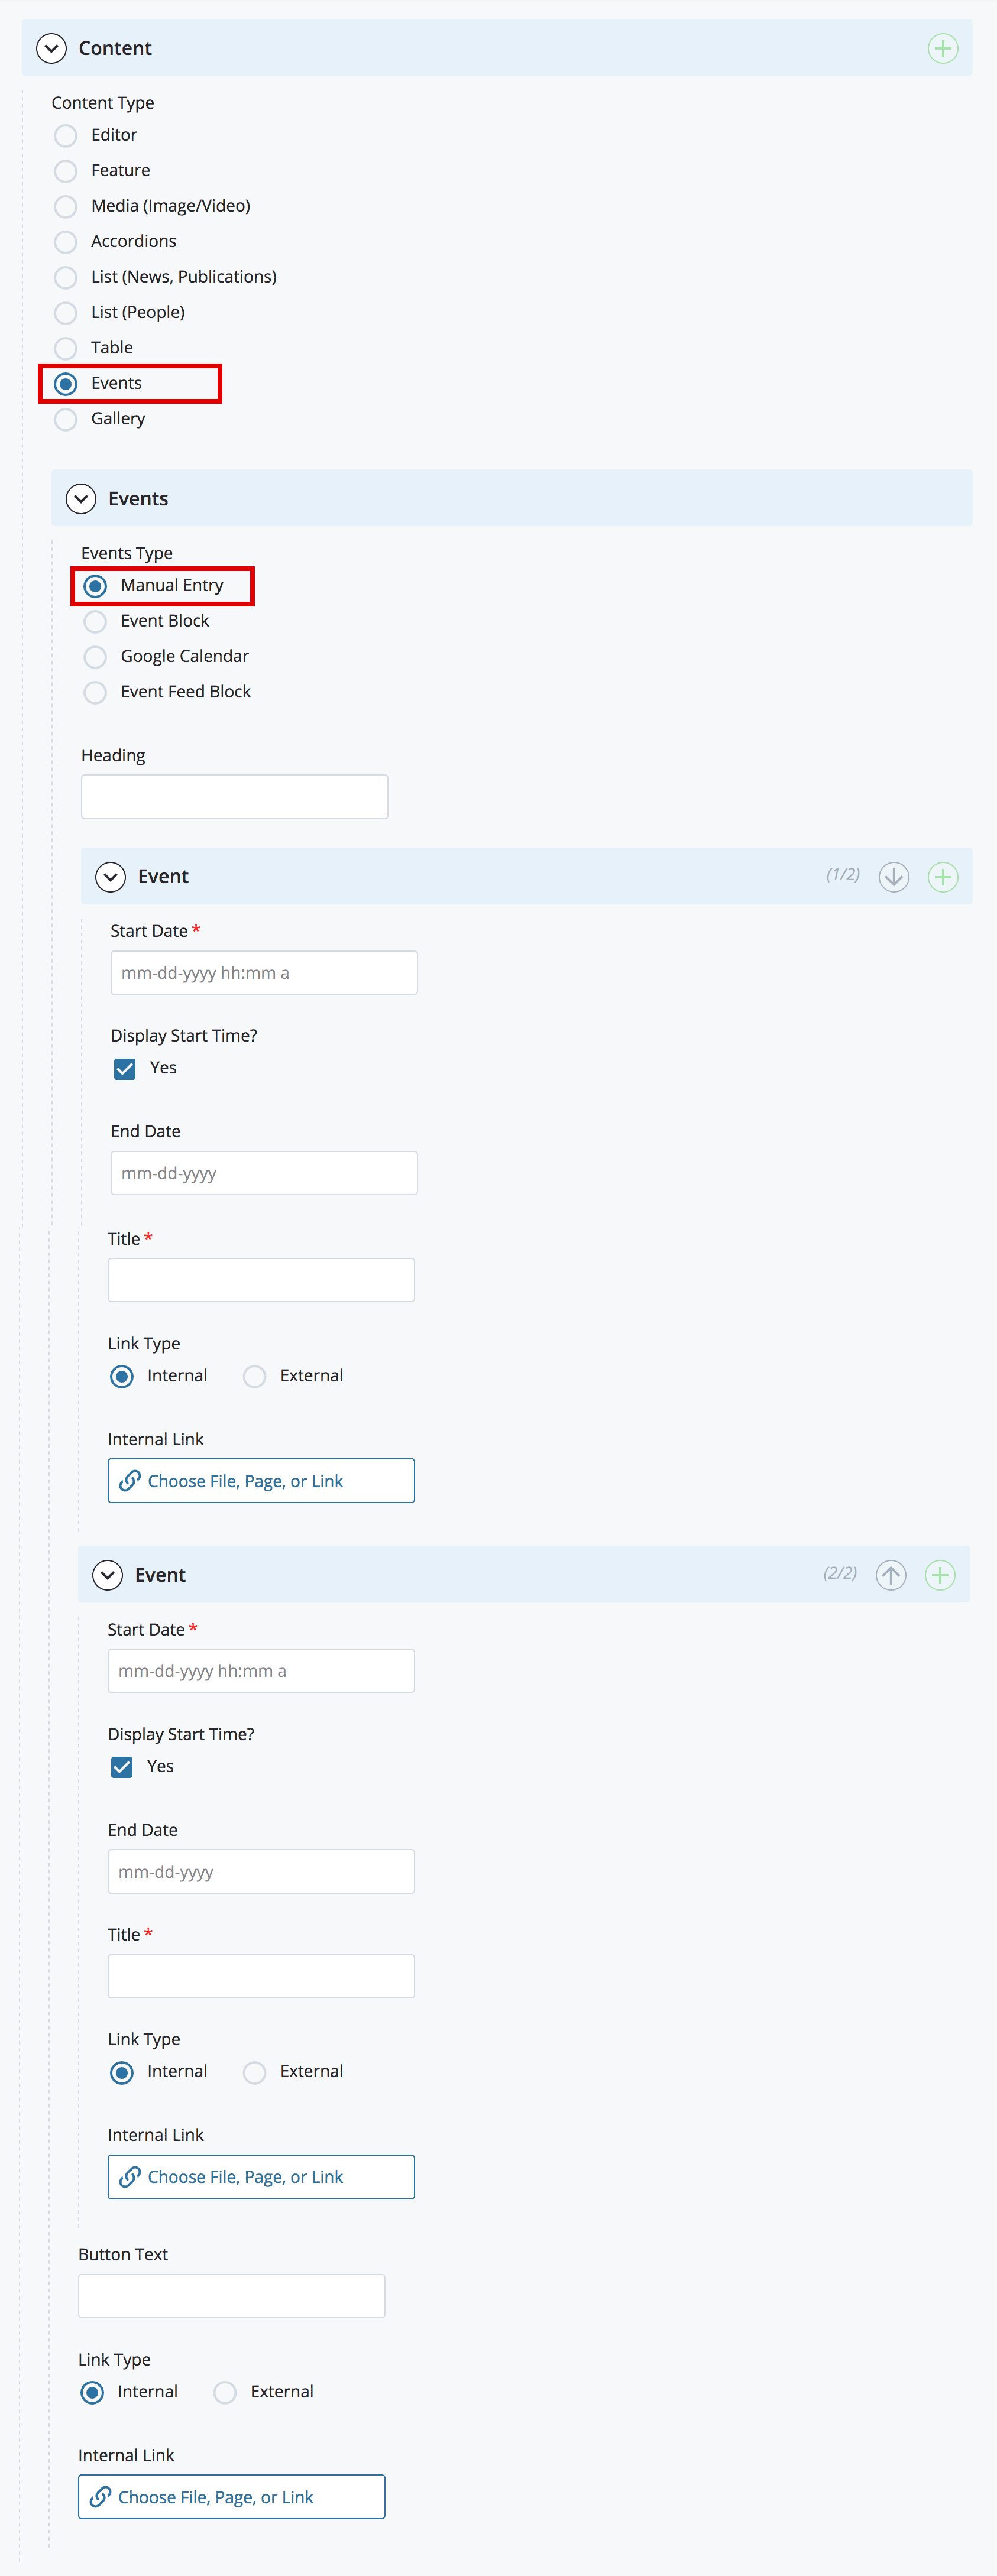
For each event you will need to add:
- Start Date and Time: Select a future date from the calendar. Select the Clock icon to enter a start time. (Required)
- Display Start Time: This is checked by default. If you do not want a start time to display, uncheck this box.
- End Date: Select an end date from the calendar. (Optional)
- Title: Enter the title of the event. (Required)
- Link Type: Select the Internal or External radio button. If you are using an Internal Link, click Choose File, Page, or Link. In the Chooser Panel, you can select a recent internal page, or browse for an internal page. If you are using an External Link, enter the URL, including the https://.
You can add another event using the plus ( + ) sign in the blue bar to the right of the word Event. You can also reorder events using the up/down arrows.
After you have added each event, on the bottom of the editor, you can decide if you want to add a button using the Button Text field. This could be useful to link to a larger Upcoming Events page.
Event Block
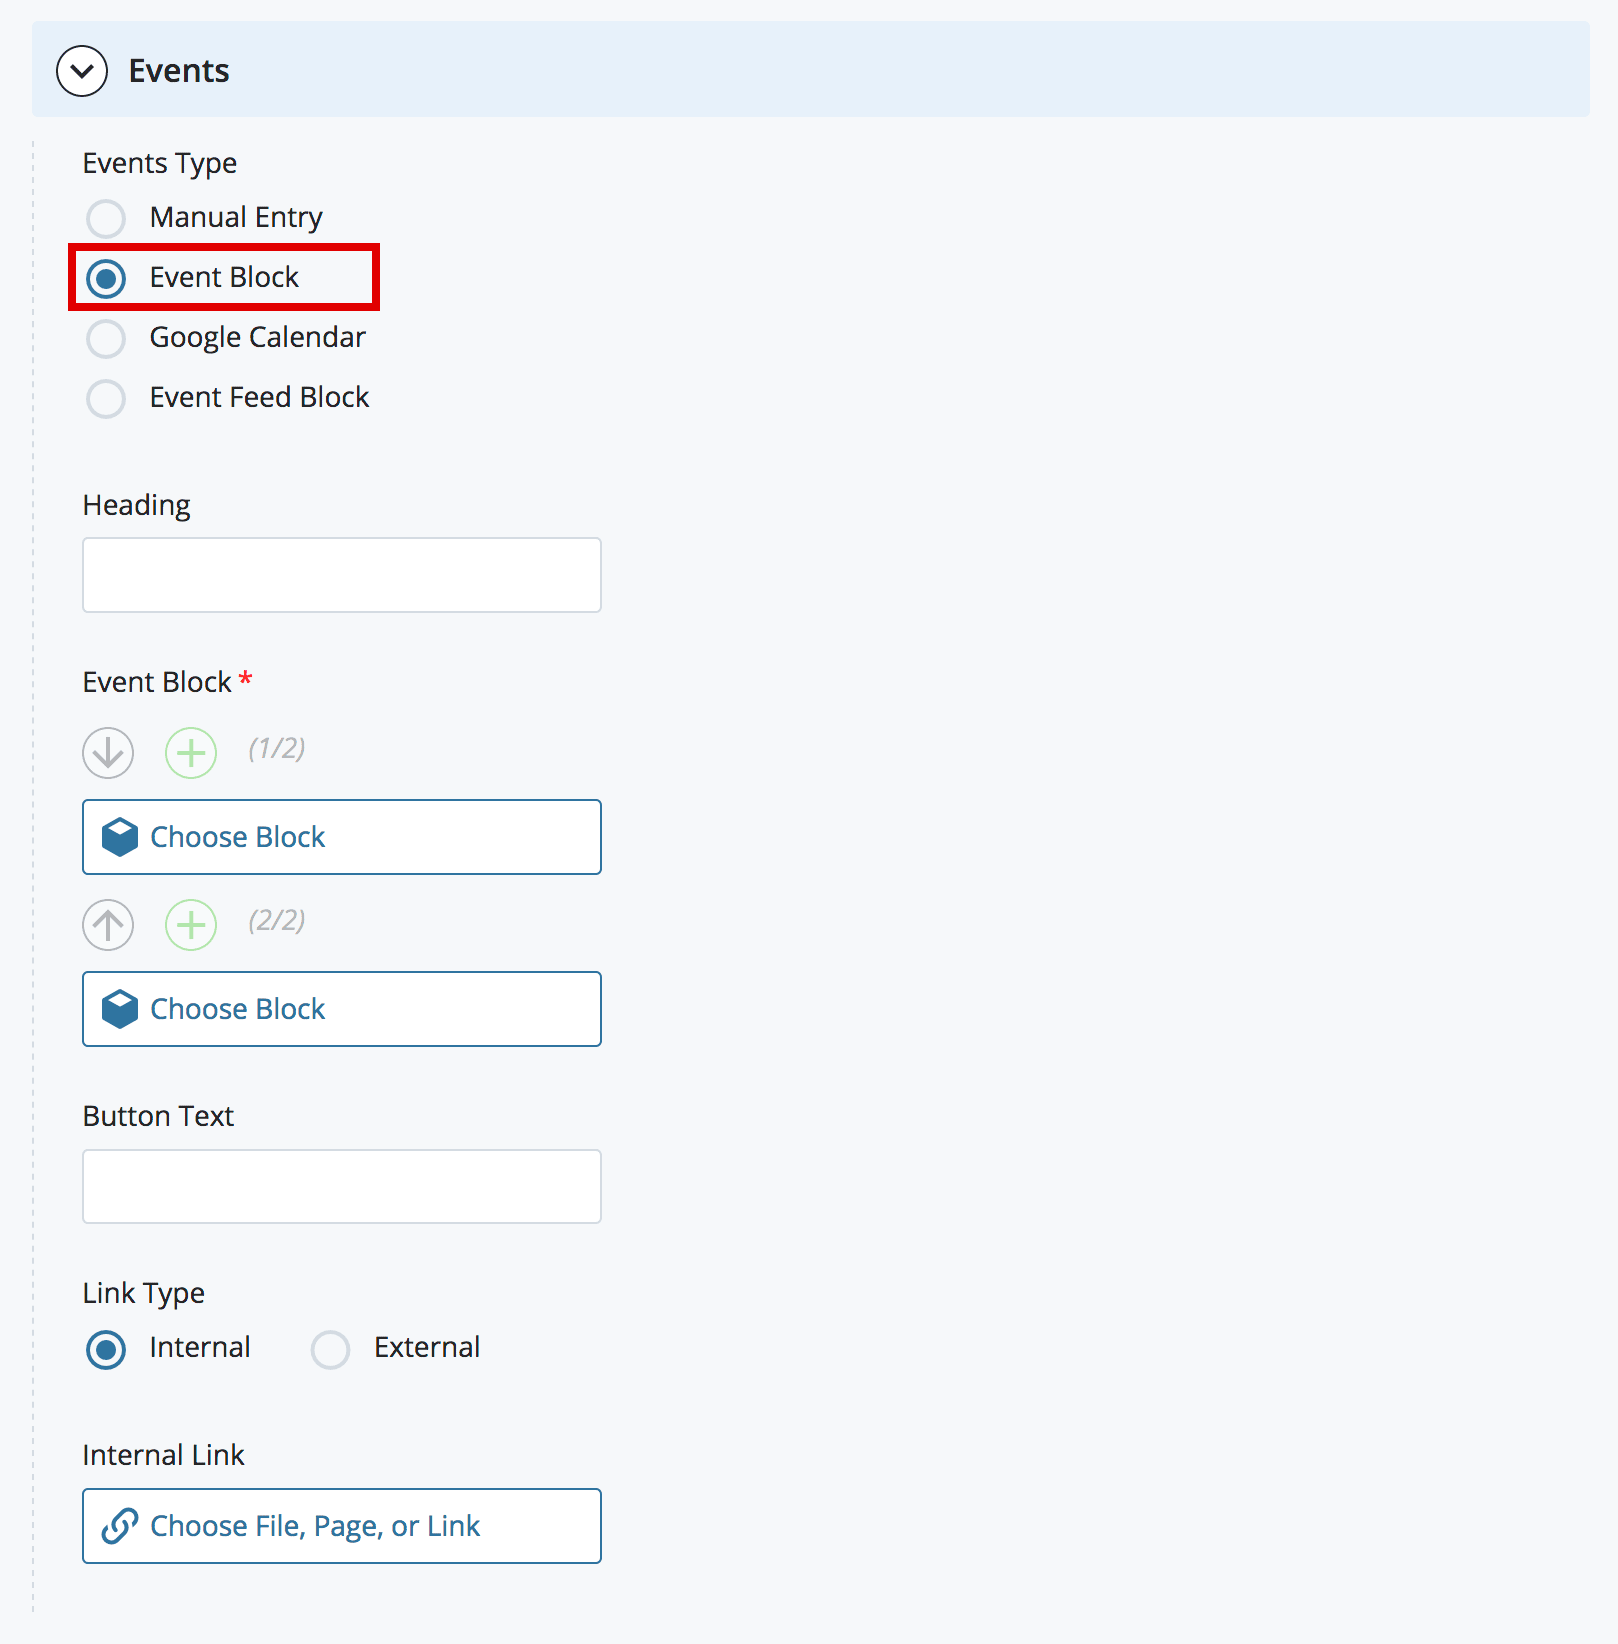
You must add two events in order to use the Event Block method. To add a event using the Event Block functionality, you first need to create your Event Block.
- Navigate to _blocks > reusable. Once there, click Add Content > Event Block. Your new block will appear, starting on the Content sub-tab.
-
Enter a XHTML/Data Definition Block Name (previously System Name) at the top of the Content screen.
The XHTML/Data Definition Block Name is the name that is displayed in the navigation panel in Cascade. Unlike the system name of a page, the XHTML/Data Definition Block Name of an Event Block will not appear in a URL.
Best Practice: Keep names short; use only lowercase letters, numbers and dashes. Do not use spaces or underscores.
- The fields in the Event Block are the same as the fields in the Event manual entry, with three exceptions.
- The Image field is only available for Event Blocks. The Image is only displayed when the Event Block is used with a Featured Event.
- The Alt Text field is only necessary if you use an image.
- Keep the Is this a featured event? box unchecked unless you are using this block for a Featured Event.
- When you have filled in all of the fields, submit.
Then, you need to add the Event Block to your page.
- While editing the page, click the Events content type and select the Event Block radio button.
- Enter a Heading - Large text centered at the top of the event section. Suggestions: “Upcoming Events” or “Event Calendar”.
- Event Block: Search or navigate to the event blocks you created.
Google Calendar
The Google Calendar option allows you to pull in content from an existing Google Calendar.
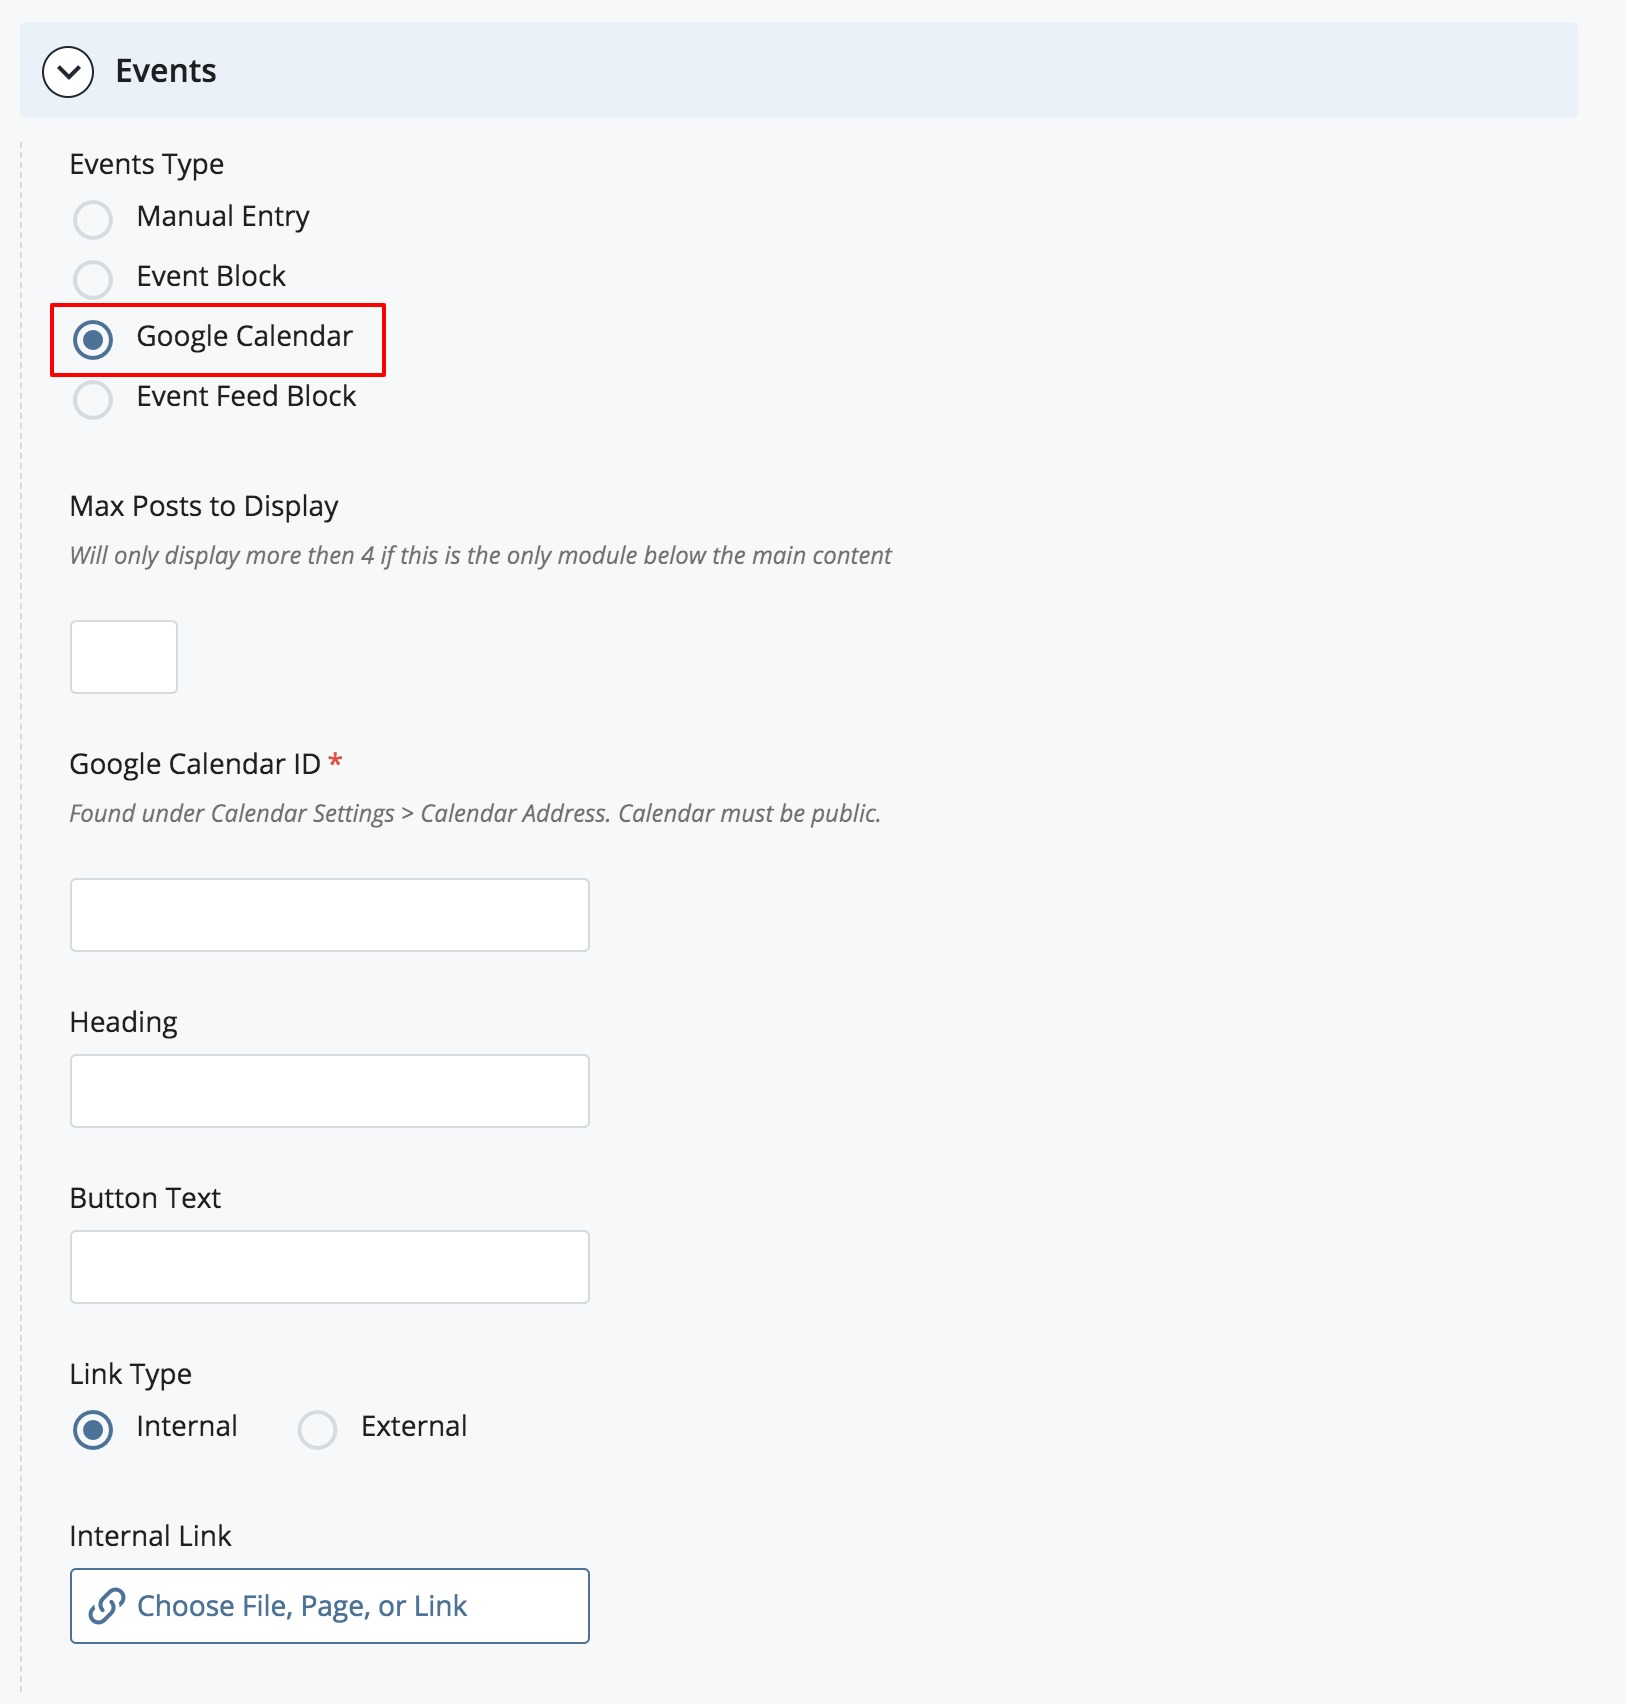
- Max Posts to Display: Determines how many events are displayed. The system will only display more than four events if you are adding Event content in the Main Content section.
- Google Calendar ID: You can find this in your Google Calendar under Calendar Settings > Calendar Address. Your Google Calendar must be public in order to add it to your website.
- Heading: Large text centered at the top of the event section. Suggestions: “Upcoming Events” or “Event Calendar”
- Button Text: Include a button if you want to link to a larger Upcoming Events page.
- Link Type: Select the Internal or External radio button. If you are using an Internal Link, click Choose File, Page, or Link. In the Chooser Panel, you can select a recent internal page, or browse for an internal page. If you are using an External Link, enter the URL, including the https://. The link will only display if you include Button Text.
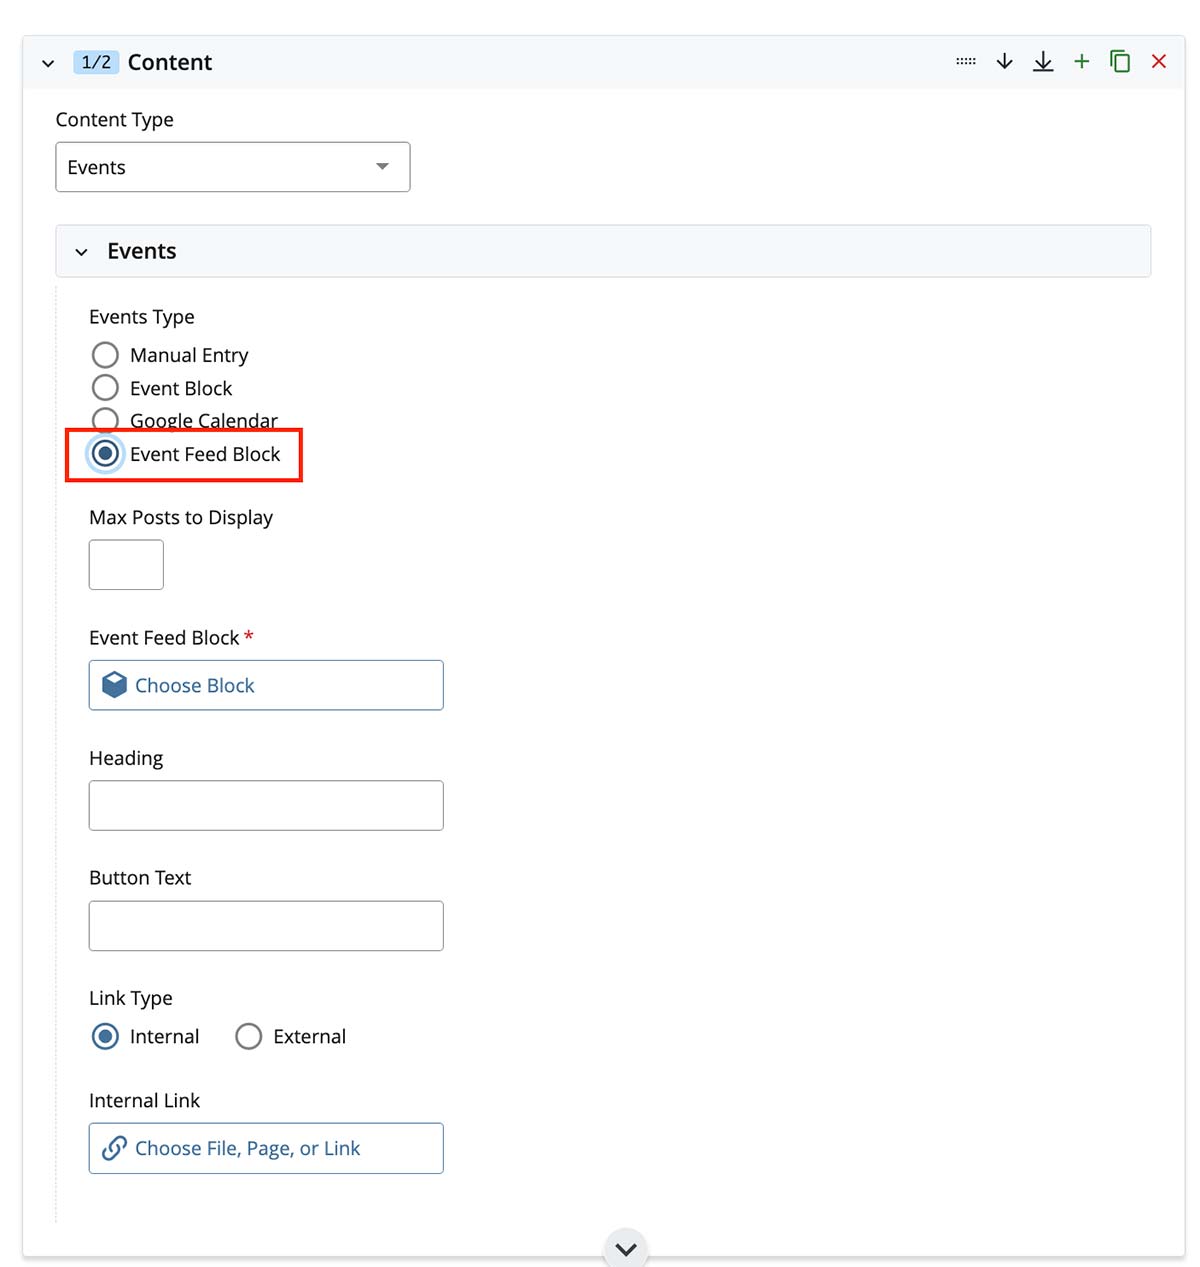
Event Feed Block
The Event Feed Block option allows you to pull in a calendar feed from a source other than Google Calendar.
RSS Block functionality is used to create an Event Feed Block.
- Email cmshelp@brandeis.edu to request that your Event Block be set up.
- Then, you need to add the Event Block to your page. While editing the page, click the Events content type and select the Event Feed Block radio button.
- Max Posts to Display: Determines how many events are displayed. The system will only display more than four events if you are adding Event content in the Main Content section.
- Event Feed Block: Click Choose Block to launch the Chooser Panel, which will allow you to browse to the RSS Block created (typically saved in _blocks > reusable).
- Heading: Large text centered at the top of the event section. Suggestions: “Upcoming Events” or “Event Calendar”.
- Button Text: Include a button if you want to link to a larger Upcoming Events page.
- Link Type: Select the Internal or External radio button. If you are using an Internal Link, click Choose File, Page, or Link. In the Chooser Panel, you can select a recent internal page, or browse for an internal page. If you are using an External Link, enter the URL, including the https://. The link will only display if you include Button Text.
Once you have added the event information to the page, submit.