Publishing and Un-publishing
Publishing
Publishing is the act of sending all or part of your site to the web, either to the live Brandeis website, or the test website. You can publish a page, folder, file or your entire/whole site. You may also view more information about unpublishing.
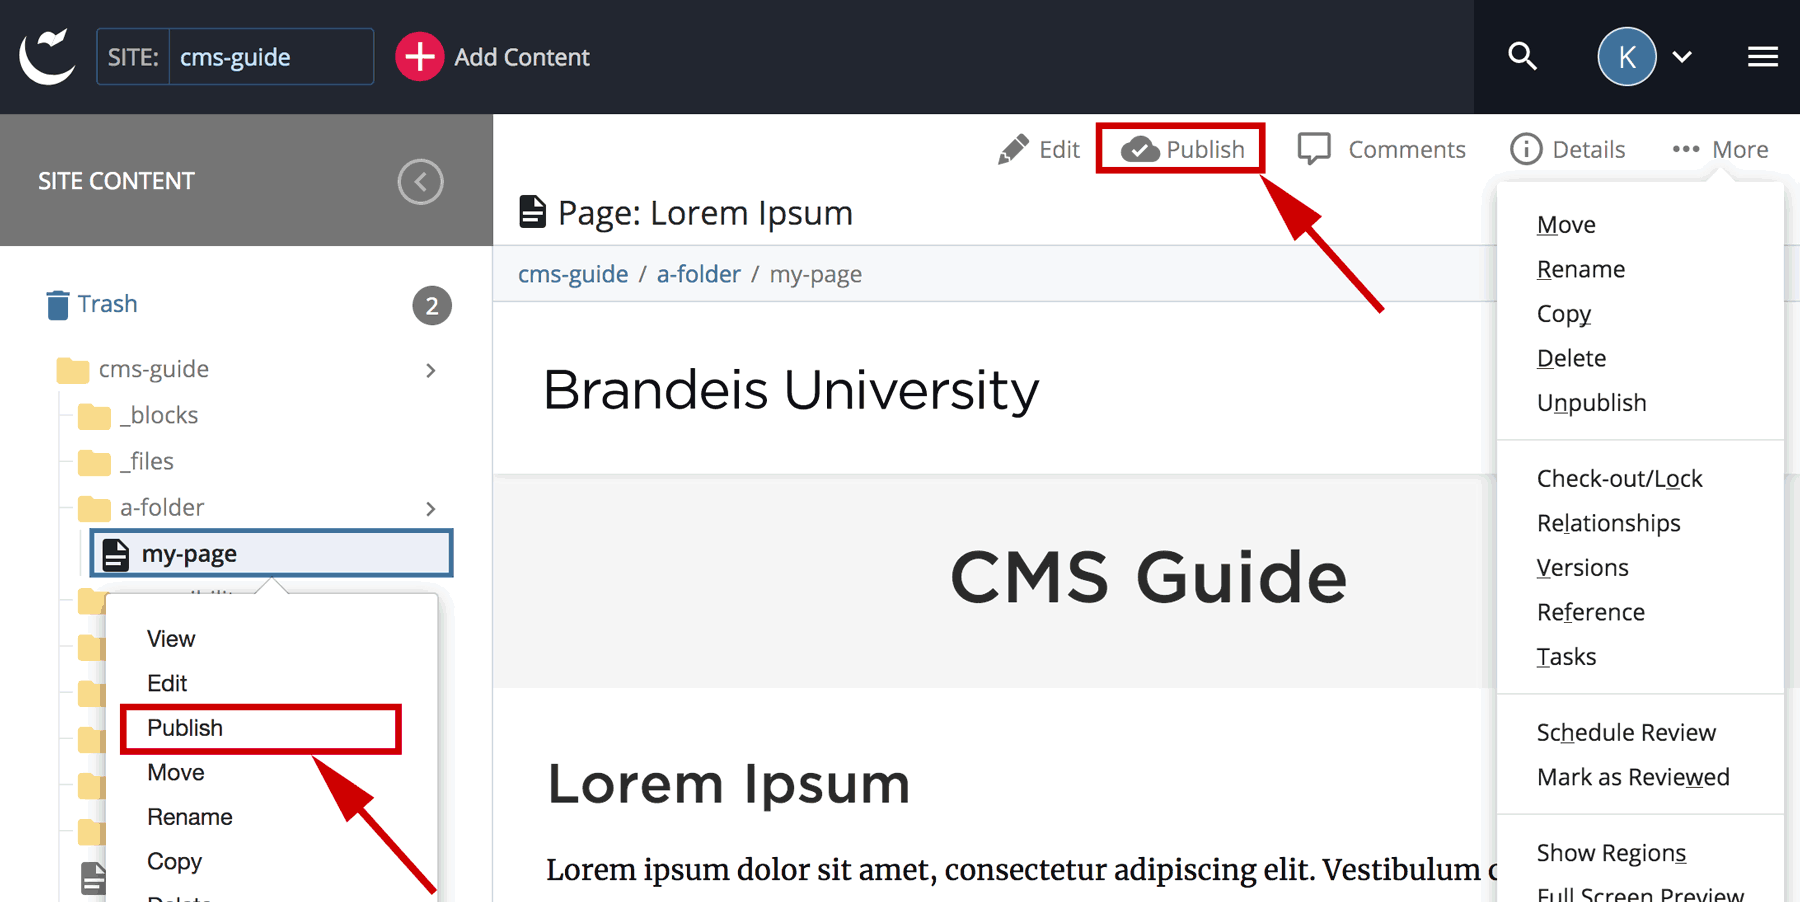
- Select the asset you wish to publish from the Site Content panel, then click the Publish button in the main part of the screen. Or right-click the page in the Site Content panel and choose Publish.
Note: If you have only modified the content of a page, you only need to publish that page, not the entire folder or whole site.
Note: If you have deleted, reordered or moved a page that was in a folder, publish the folder(s) that changed. You should only publish your entire site if you have made changes to the left navigation at the top level (by adding, removing or moving an asset or modifying a page or folder name). Publish your whole site during off-hours, such as before 9 a.m. or after 5 p.m. View publishing tips.
- In the publish screen you will see a series of check boxes. (If the Publish Settings section is not visible, click the arrow to expand it.) Clicking the box Generate a Publish Report is checked by default, and will create a notification within the CMS about your publish job.
- Leave the box next to Outputs checked, if visible.
- Destination: Test and Live. The Test destination is our webtest server. Always publish to the Test destination first to review your work. The Live destination is the public website. Only publish Live if you have reviewed your work first on webtest. (Note: If you do not see the Destination checkboxes, click the text View Publish Settings to expand that section.)
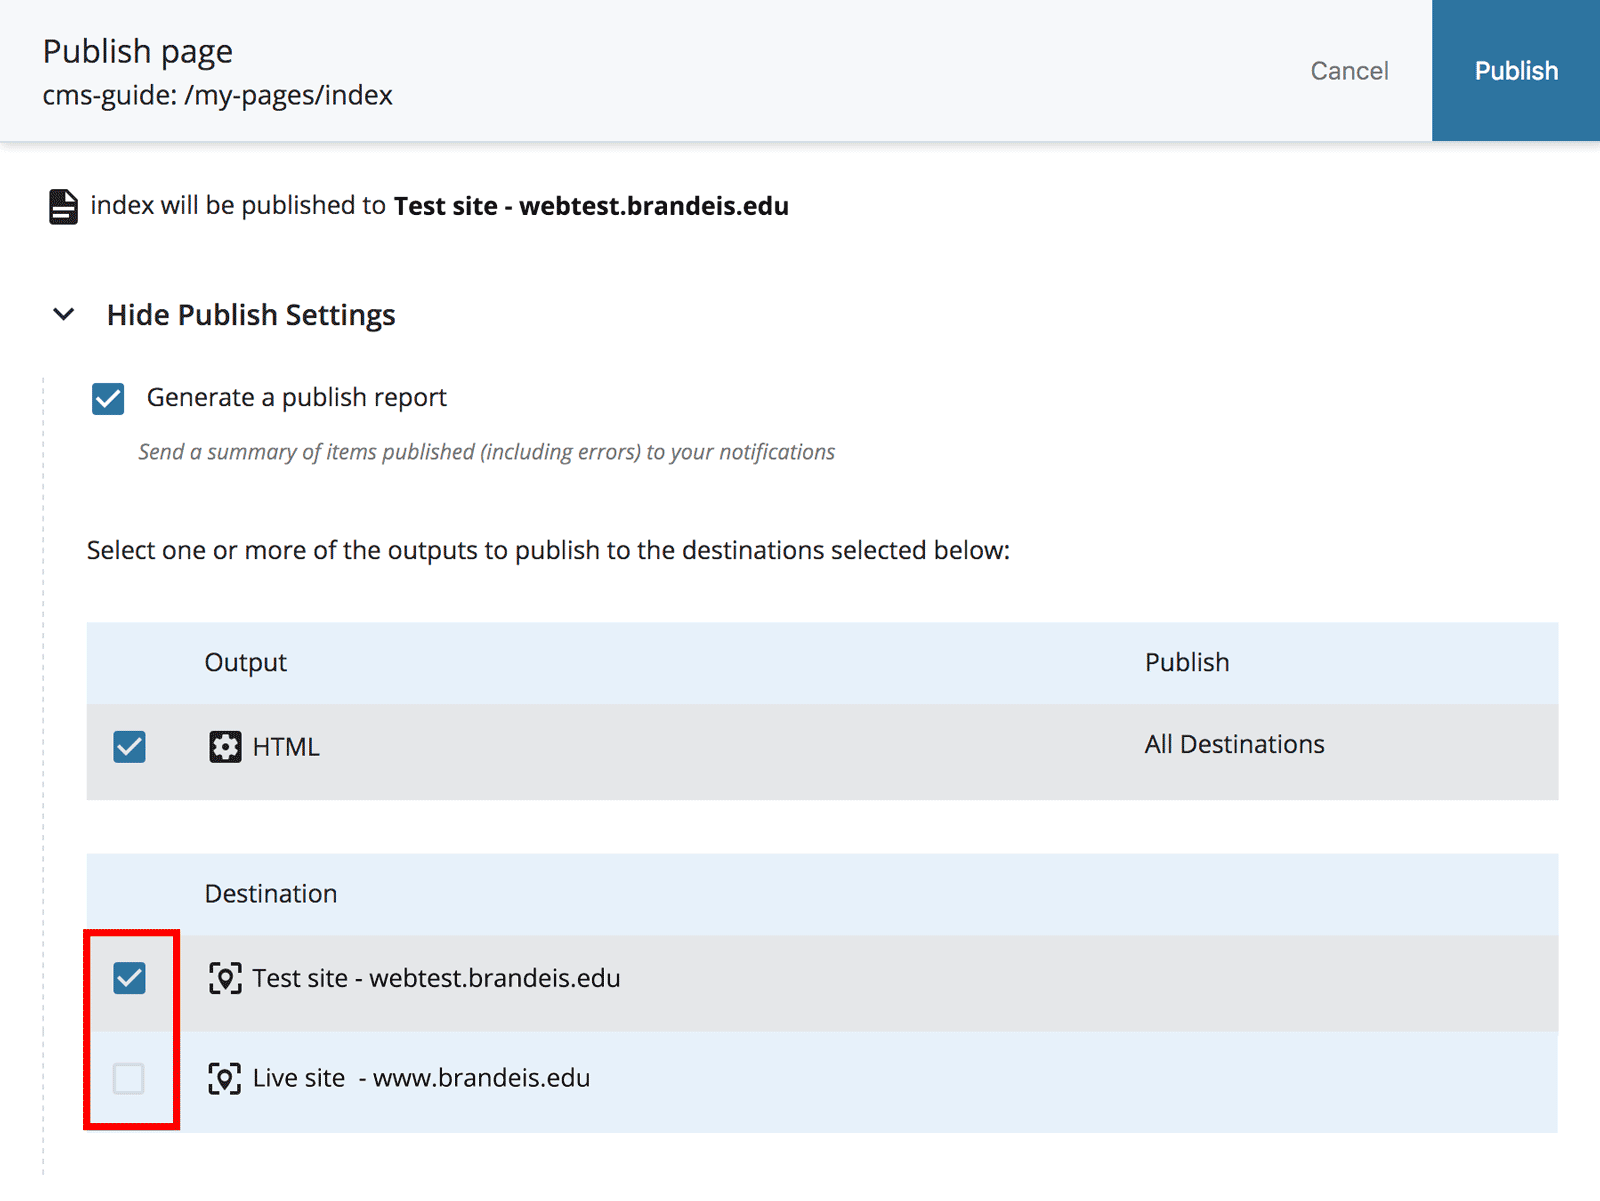 If a box is checked, you will publish to the associated destination. Ensure that the appropriate destinations are checked or unchecked, then press the blue Publish button to publish.
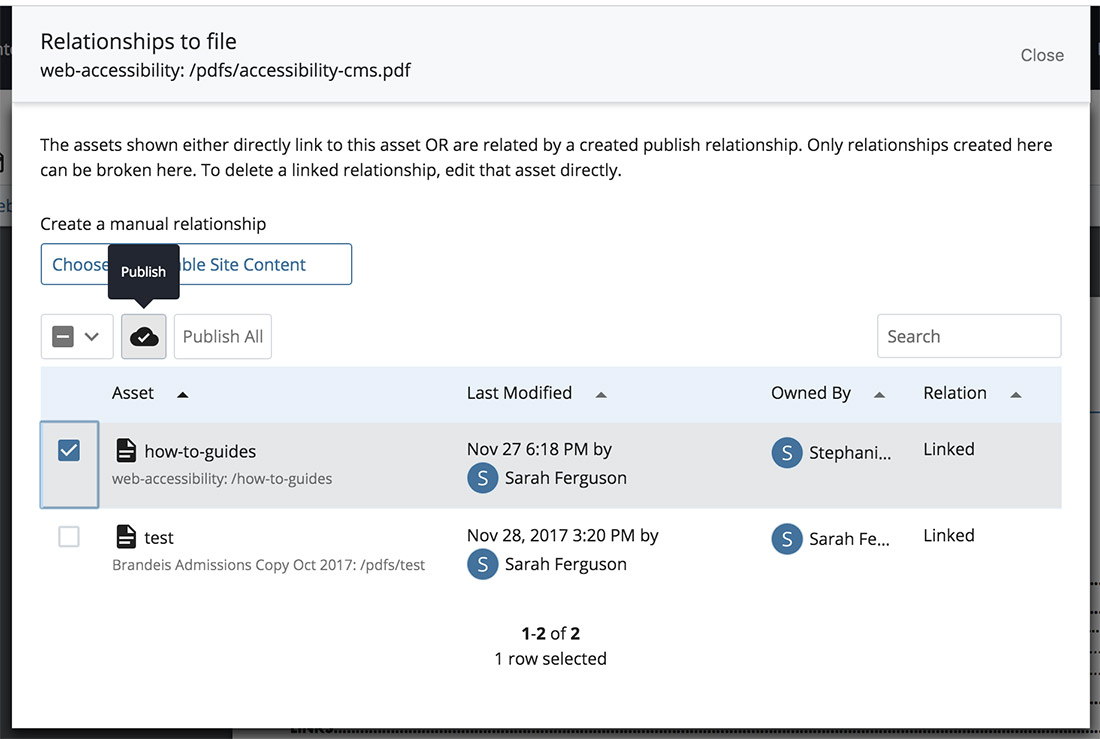
 - If you checked the box next to View & Publish Related Content, you will be brought to a screen which lists assets that link to the content you are publishing. Review the list and select related assets to publish, if necessary. Or, click Close. Read more about Relationships.
Best Practice: Before publishing your pages live, you should first publish to the test server. Every website has a webtest corollary. This gives you an opportunity to review the pages privately before they become available to the public.
- Publishing is not instantaneous, but rather a queue of all publishing jobs in the system. You can check the status of your job on the Publish Queue screen. Click the Hamburger Menu icon (three horizontal lines) in the top-right black toolbar. Then Publish Queue. You'll either see your job in the Publish Queue or as a Scheduled Publish Job. If the Publish Queue is empty, your job has already completed.
Check Your Work
Check your page in a browser
Once your job is finished publishing, you can view your site in a web browser. If in Cascade CMS, your site folder is /sample, then the corollary test and live sites are at:
- https://webtest.brandeis.edu/sample
- https://www.brandeis.edu/sample
For a specific page, it is a similar pattern, but with .html appended. If a page in Cascade CMS is: /sample/example
The corollary test and live pages are at:
- http://webtest.brandeis.edu/sample/example.html
- http://www.brandeis.edu/sample/example.html
Unpublishing and Unindexing
Unpublishing an asset will remove it from the web, but leave it in Cascade CMS. This is useful for out-of-date content that you may wish to keep for reference.
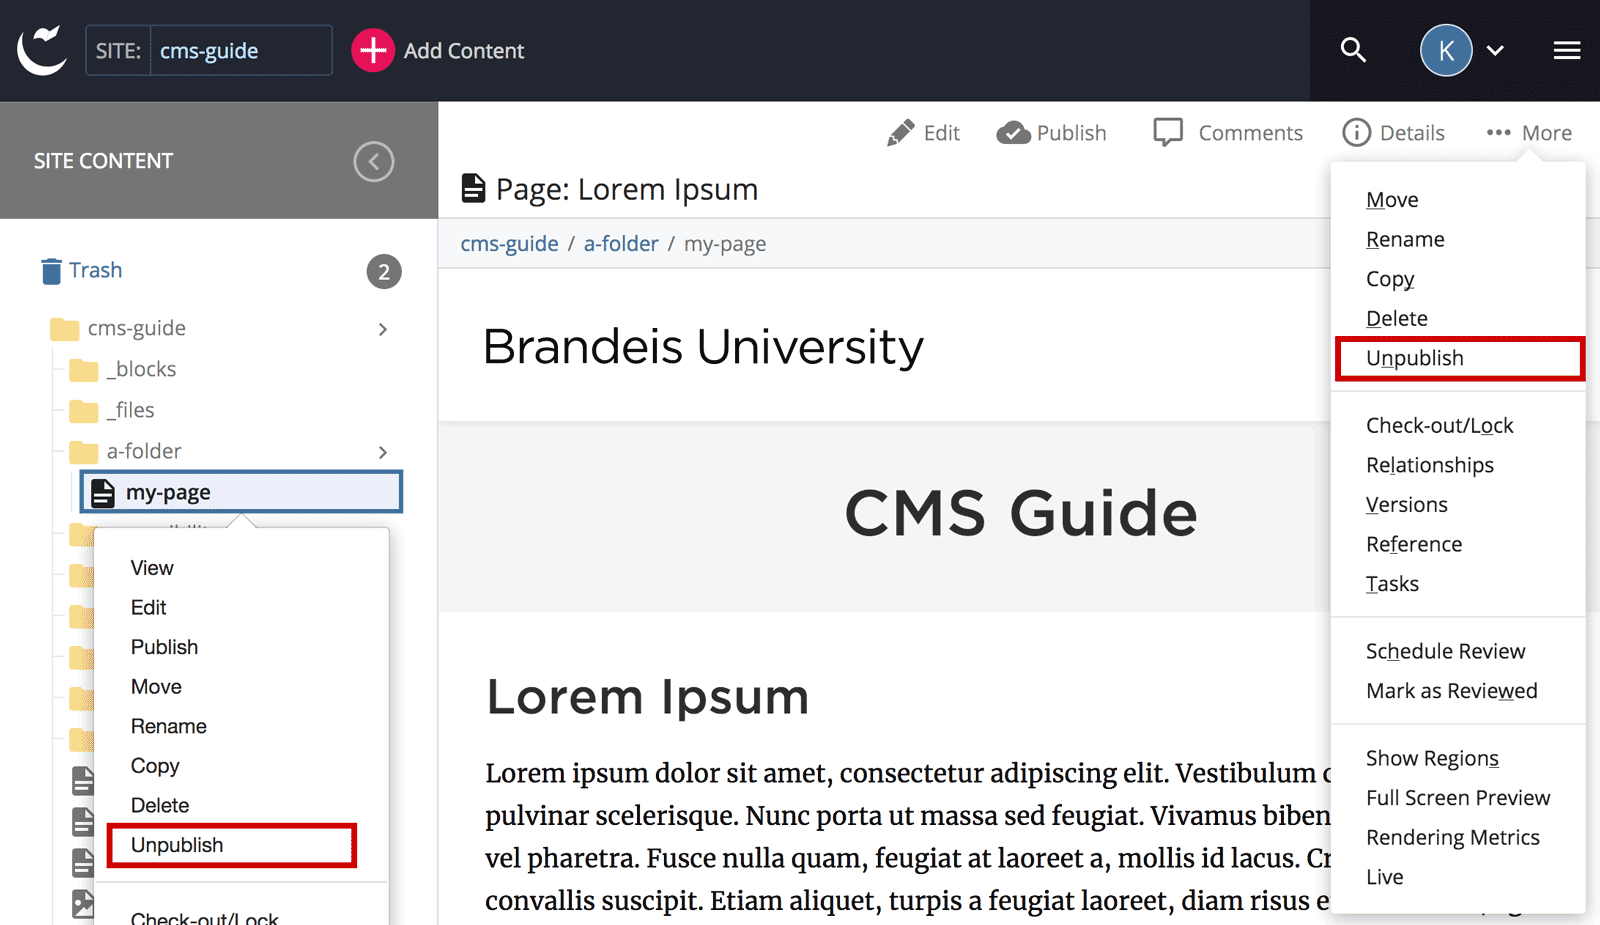
- Right-click the asset you wish to un-publish in the Site Content panel then click the Unpublish tab from the main part of the screen or select the asset, expand the More menu, and select Unpublish.
- Select the Destination (normally you'd choose both Test Site and Live Site to unpublish a page that has been published live) and click Submit.
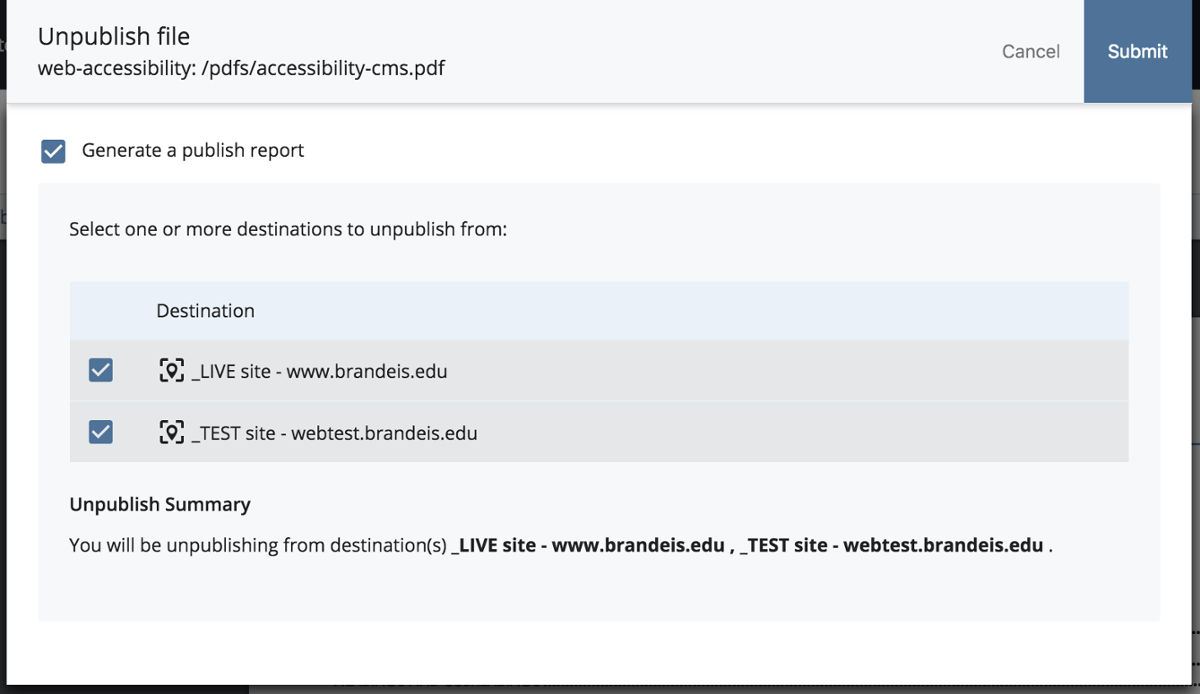
- You should see the “Unpublish message sent successfully” banner at the bottom of the page.

Once the job is complete, it will no longer be in the queue.
Preventing a page from publishing
There are some circumstances where you don't want a page to publish. Perhaps you are working on a page for an extended period, or perhaps you want to remove content from the website temporarily. You can prevent a page from being published by setting a preference in the Configure tab:
- Select the asset from the navigation panel, and then click on the Edit button, and Configure tab.
- Un-check the Include when publishing and Include when indexing boxes.
The first box prevents accidental republishing; the second removes the asset from the site navigation but does not unpublish the asset. They can be rechecked at any time.
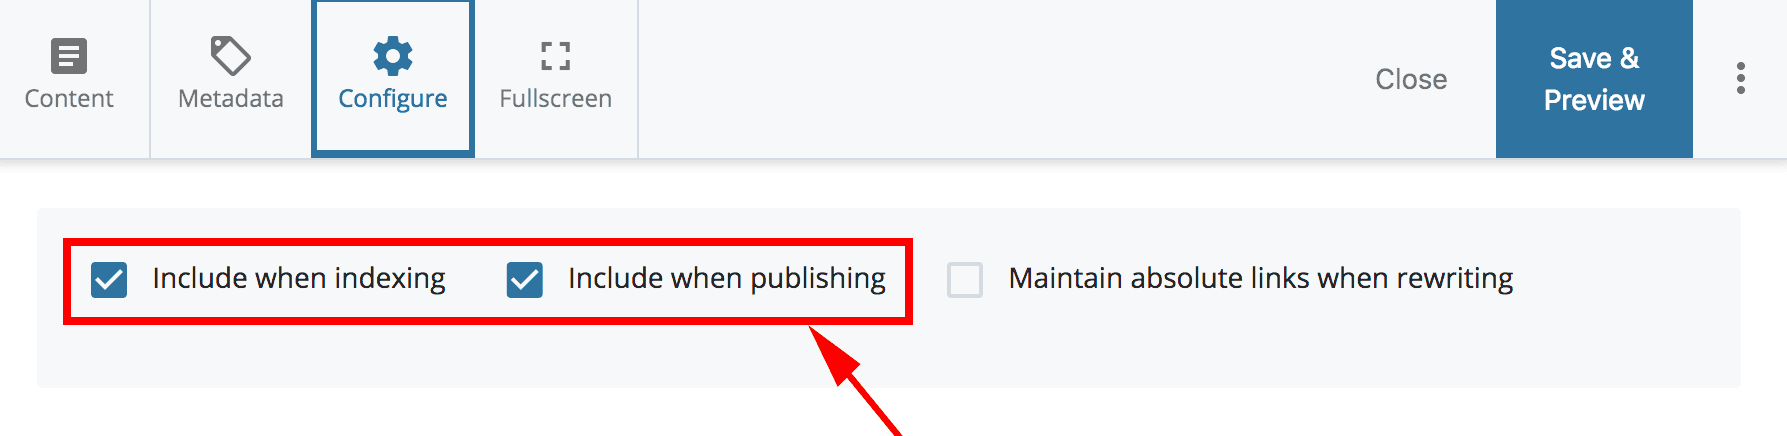 Click Save & Preview, then Submit when you are finished.
 - Lastly, publish your entire site. This will remove any dead links from your site navigation.
Publishing Entire Site
Publishing an entire site should be done anytime a change is made to the navigation. This includes adding a new page to the navigation, removing a page from the navigation or reordering your navigation. If you do not publish the entire/whole site, your navigation might be broken on some pages, or out of date.
To publish your entire site, select the top-most folder in your site content panel, then click Publish. This video demonstrates how to publish your entire site to the test server. To publish your entire site to the live server, leave all boxes checked in the publish screen.
Please note: This video has no sound.