Adding and Editing Folders
Folders are assets that contain other assets. They are used to add hierarchy to your site navigation or as containers for non-page assets (images, PDFs, etc.).
Creating a New Folder
Watch: Creating a folder
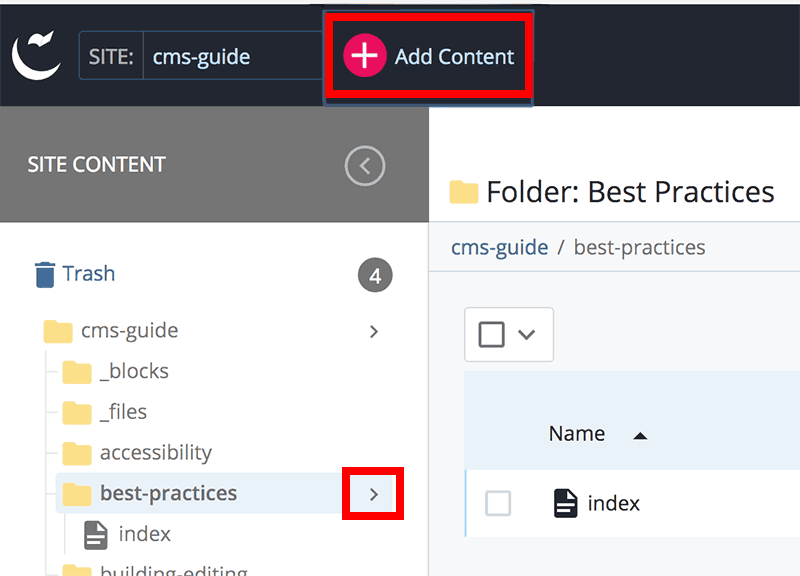
- From the Site Content Menu, select the folder under which you wish to add the new folder. Then click the Add Content menu (pink plus sign).
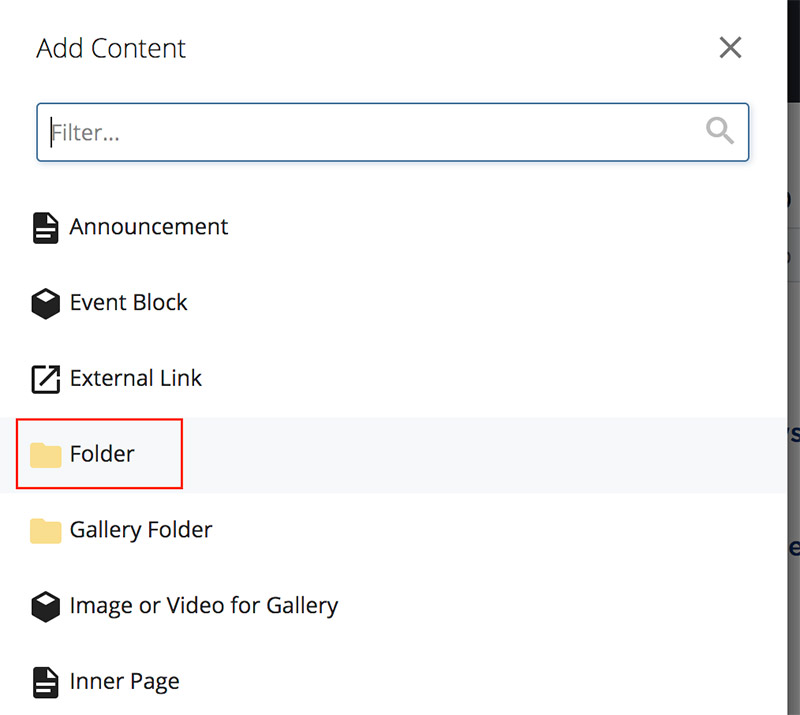
- Select Folder from the list of assets.
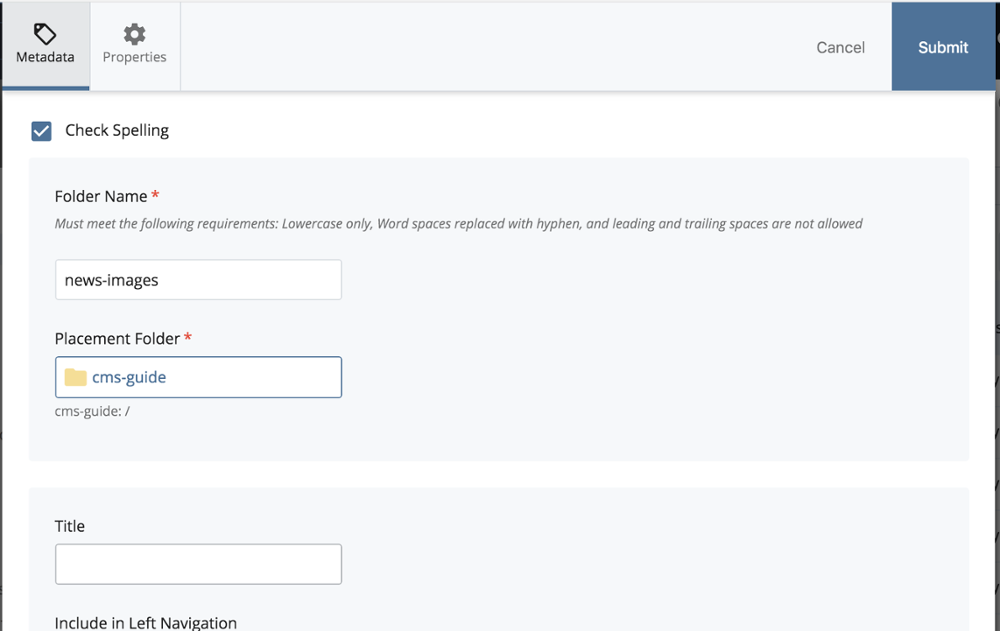
3. The Metadata options for the folder should appear in a modal window.
Fill in the Folder Name field. This is the name that will appear in the CMS next to the folder in the Site Content menu, and will also appear online in the URL.
Best Practice: Keep folder names short; use 1-3 relevant keywords; only lowercase letters, numbers and dashes. Do not use spaces or underscores. The system will reject any names that do not meet these requirements.
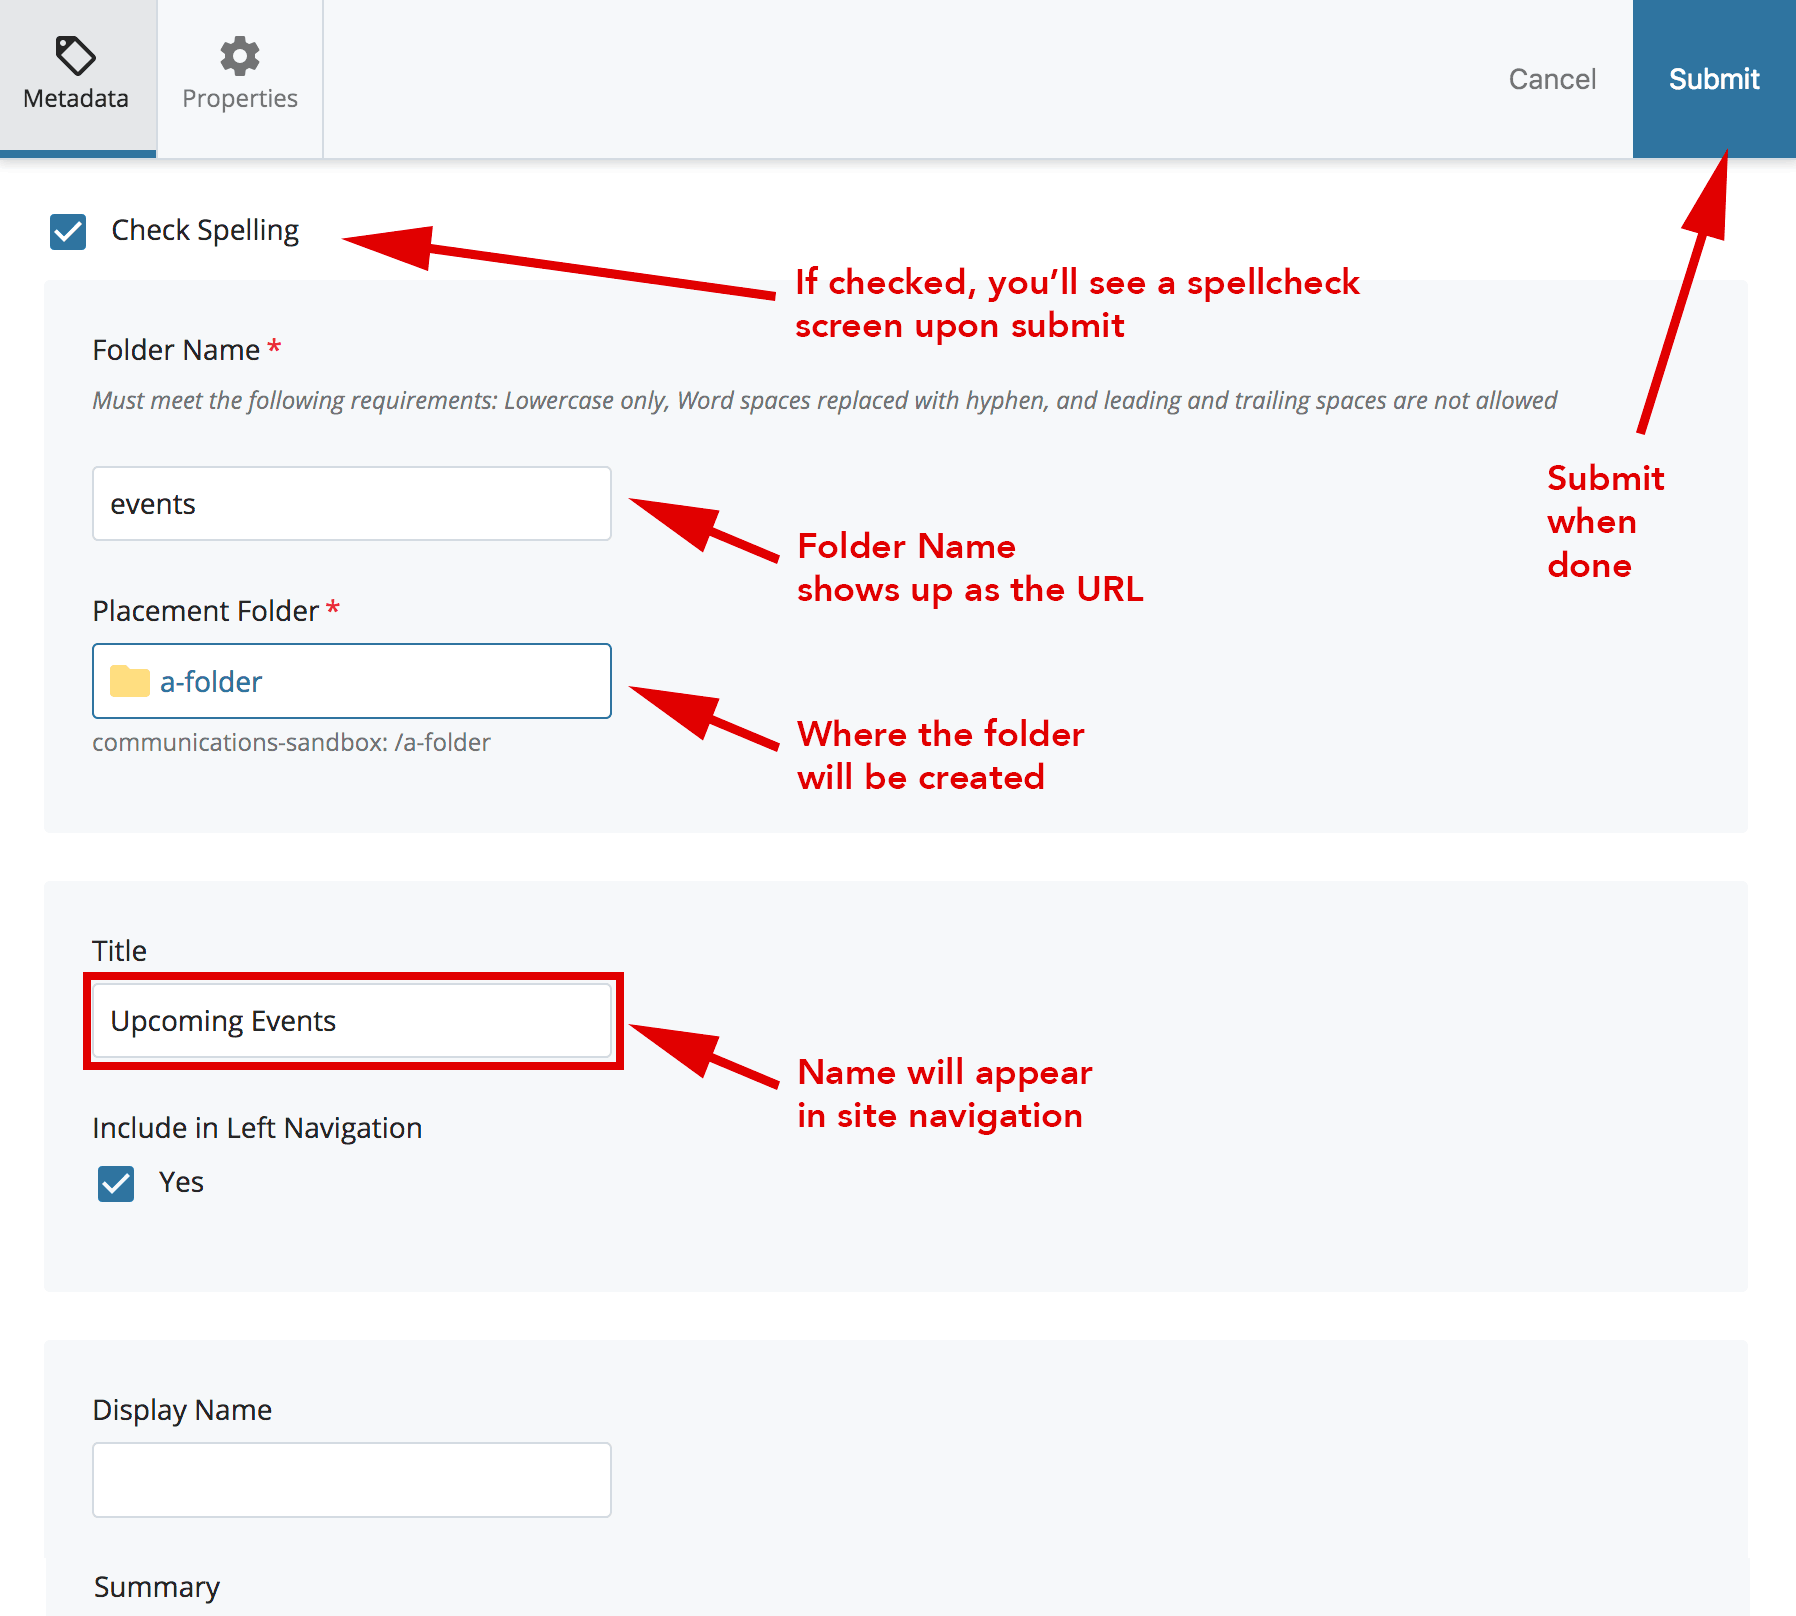
Beneath Folder Name is Placement Folder, the directory path in Cascade for the new folder. Look here to ensure you are creating the folder in the correct place. If you want to save the folder to a different location, click the box under Placement Folder and the Chooser Panel will open, allowing you to select a location.
- Enter the Title of the folder. This is the name that will appear in the left-hand navigation of your site (if you choose to display it there), in your site’s breadcrumbs and in the title bar at the top of a web browser. This information is critical, as search engines index this information and rank pages accordingly.

Check the Include in Left Navigation checkbox if you want this folder to be included in your site’s navigation.
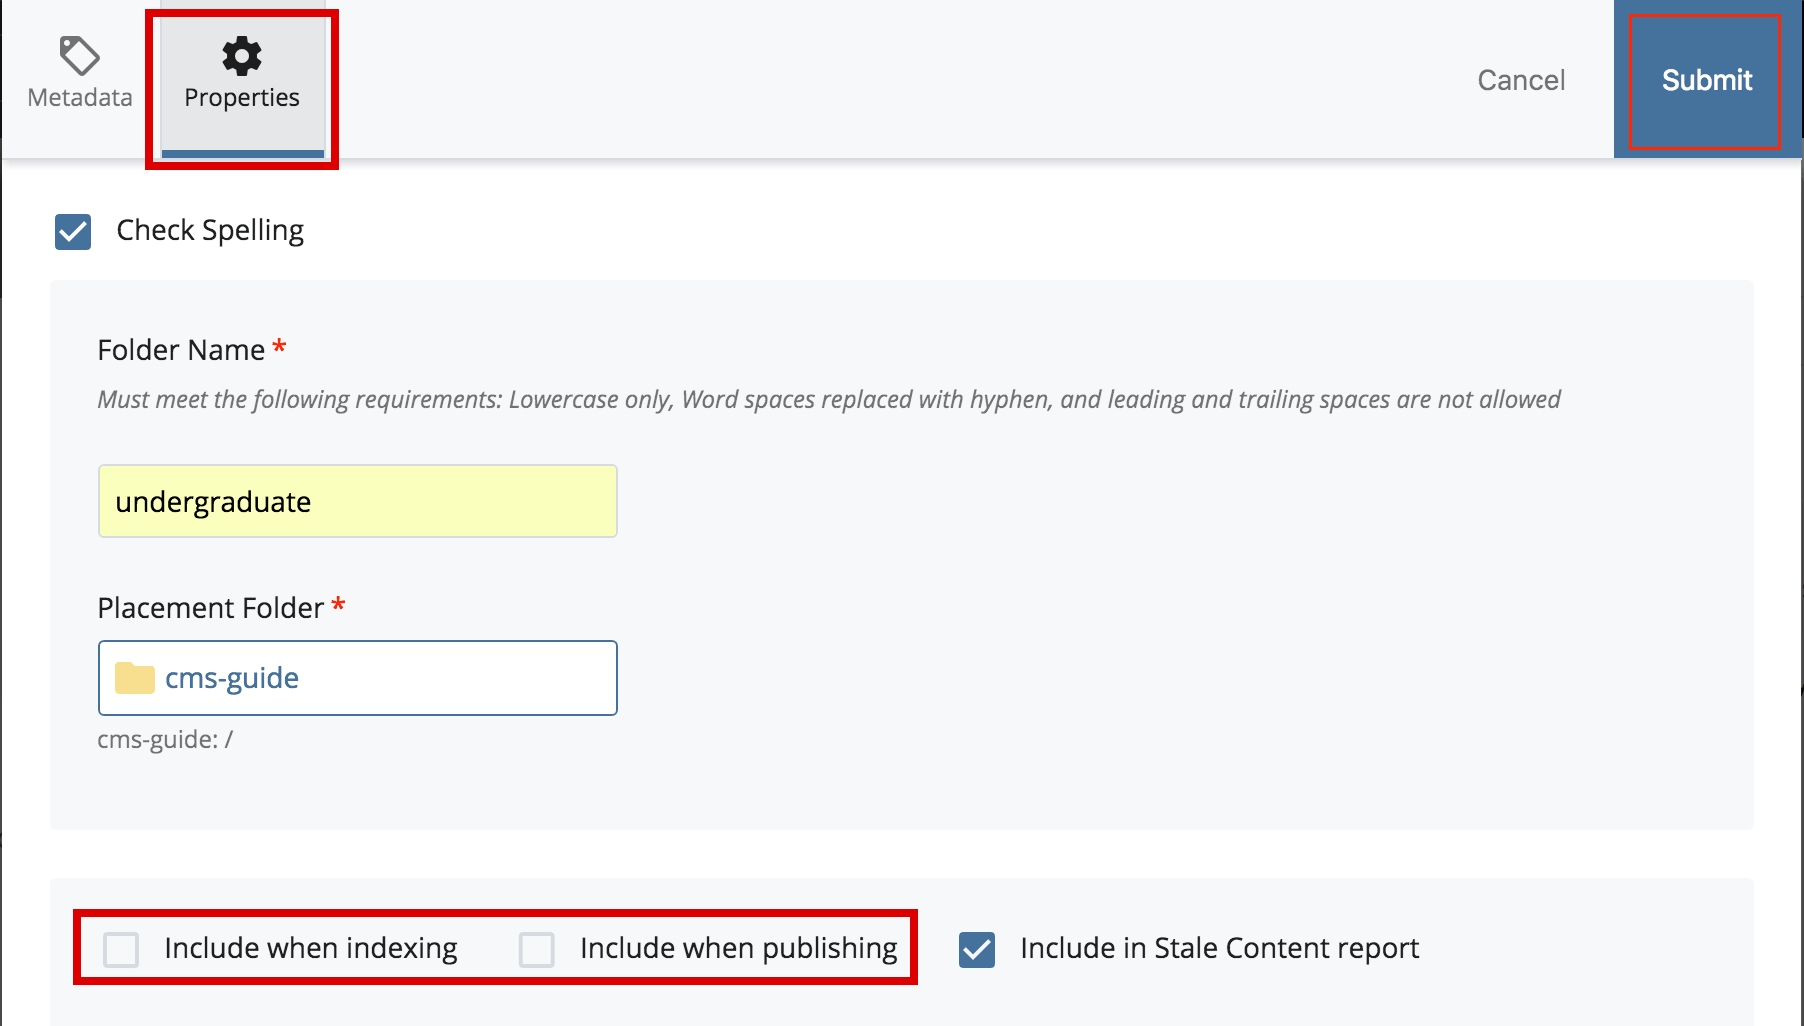
Note: If you don’t plan to publish your new page immediately, un-check the Include when publishing and Include when indexing boxes and click Submit. The first box prevents the asset from appearing in the site navigation; the second prevents accidental publishing.
- You should now see the Asset created successfully banner at the bottom of the screen and the new folder should be in highlighted in the Site Content menu.

Note: In order for this folder (and its pages) to show up in the left navigation, the folder must have an index page. To have it show up in the navigation on other pages, you need to publish your entire site.
Editing a Folder
- From the Site Content menu, select the folder you wish to edit.
- Click Edit from the gray options at the top of the screen, or use the context menu.
- From there, you can edit the Title of the folder, check/uncheck the Include in Left Navigation checkbox, or check/uncheck the Include when publishing or Include when indexing checkboxes.
- Click Submit.
You will need to publish the folder for these updates to show up on the live website.
Creating a Folder for Storage
We encourage you to create folders and sub-folders within your site to store similar assets together, like images and documents. This helps maintain a tidy structure that is easy to navigate when you work on your site.
Note: Folders are a great way to organize pages and files on your site, but should only be used to store content that is being used on the website. If a file is not being used on your site, and there are no plans to use it in the near future, that file should be removed from the CMS.
1. Place your cursor on the location you would like your new folder to be created. If you want it to be created at the top level of your site, select your Base Folder. If you want to create a sub-folder of news images in your images folder, place your cursor on your images folder.
2. From the toolbar, click the (+) Add Content menu, then Folder.
Assign the folder a Folder Name. This is the name that will appear next to the folder in the Cascade navigation panel and in the URL.
Best Practice: Keep names short; use only lowercase letters, numbers and dashes. Do not use spaces or underscores. The system will reject any names that do not meet these requirements.
Beneath Folder Name is Placement Folder, the directory path in Cascade for the new folder. Look here to ensure you are creating the folder in the correct place. Click the Placement Folder to open the Chooser Panel.
Delete the default text for Title, since a storage folder will not be displayed on your site. Also, leave Include in Left Navigation unchecked for the same reason. Leave the rest of the options as is and click Submit.
Your folder should now appear in your asset list. With your new folder selected, you may now Upload files into your folder.
Folder Storage Tips
- Group all images/photos in one folder named “images”
- Within your “images” folder, you can create additional folders to group similar images. For example: images > news > alumni-weekend would contain all images related to Alumni Weekend; images > abroad > copenhagen would contain all images related to the Copenhagen study abroad program. This is optional, but may be helpful depending on your volume of images.
- You may also have images folders in other subfolders. For example, if your site generates a lot of news, you may want your news images to be in the news folder instead of a general images folder. So you would create an images folder in your-site > news > images.
- Group all documents together in a folder named “docs” or “documents.” Documents folders may also contain sub-folders.