Uploading and Updating Files
Watch: Uploading images (or other files)
To use an image (such as a .jpg or .png) or a document (such as a .pdf) on your website, you need to first upload it to Cascade. Learn more about how to update an existing image on your site.
Copyright Note: As a reminder, editors should only use images for which Brandeis holds the copyright (taken by the university photographer) or stock images that they have purchased rights to use.
Before uploading, here are a few best practices to keep in mind:
-
Create separate folders for images and documents — this will make finding things easier later.
-
Prepare your images before uploading using Photoshop or similar software. This will help prevent image distortion and long page load time caused by large files.
-
Use PDFs sparingly. PDFs must be made accessible before being uploaded.
Visit the Sizing and Editing Images page to review a list of appropriate image sizes.
Best Practice: We recommend Adobe Photoshop for image editing. More information is available at go.brandeis.edu/software.
Uploading a File
-
In the Site Content menu, select the folder into which you would like to upload the file.
-
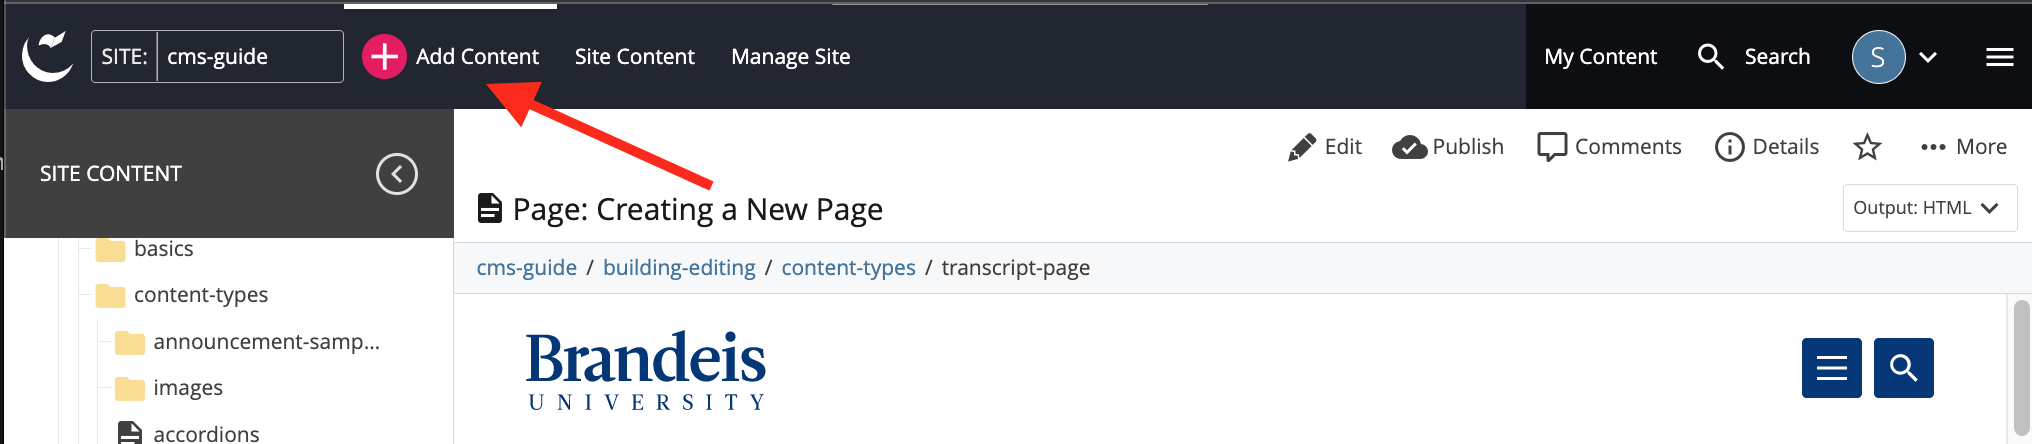
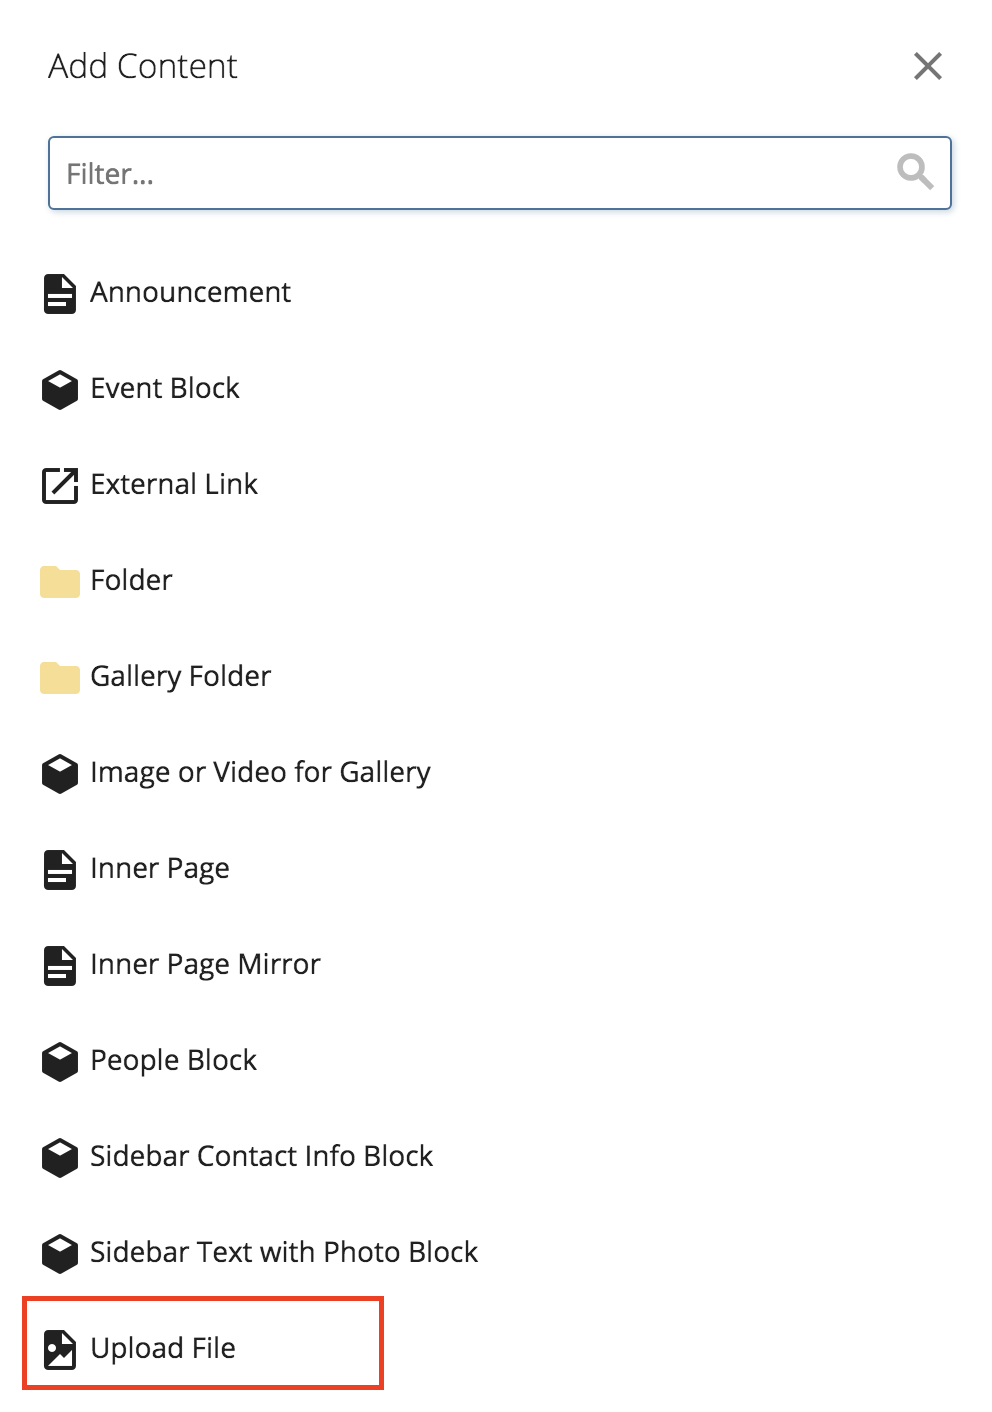
From the toolbar, select the (+)Add Content menu. Then, select Upload File.
- Browse method: To browse to your image, click the word "choose" in the dotted-line rectangle. Locate and select one or more files on your computer. Then click Open.
- Note: You may upload multiple files at the same time by simply selecting multiple files or by uploading a zip archive file. Watch a video tutorial.
- Drag-and-drop method: Or, simply select one (or more) files from your desktop and drag it into the “Drop file here to upload” rectangle. Your image(s) will appear on the screen.
Note: The file extension (such as .jpg or .pdf) will be visible in the File Name field. Please keep it there.
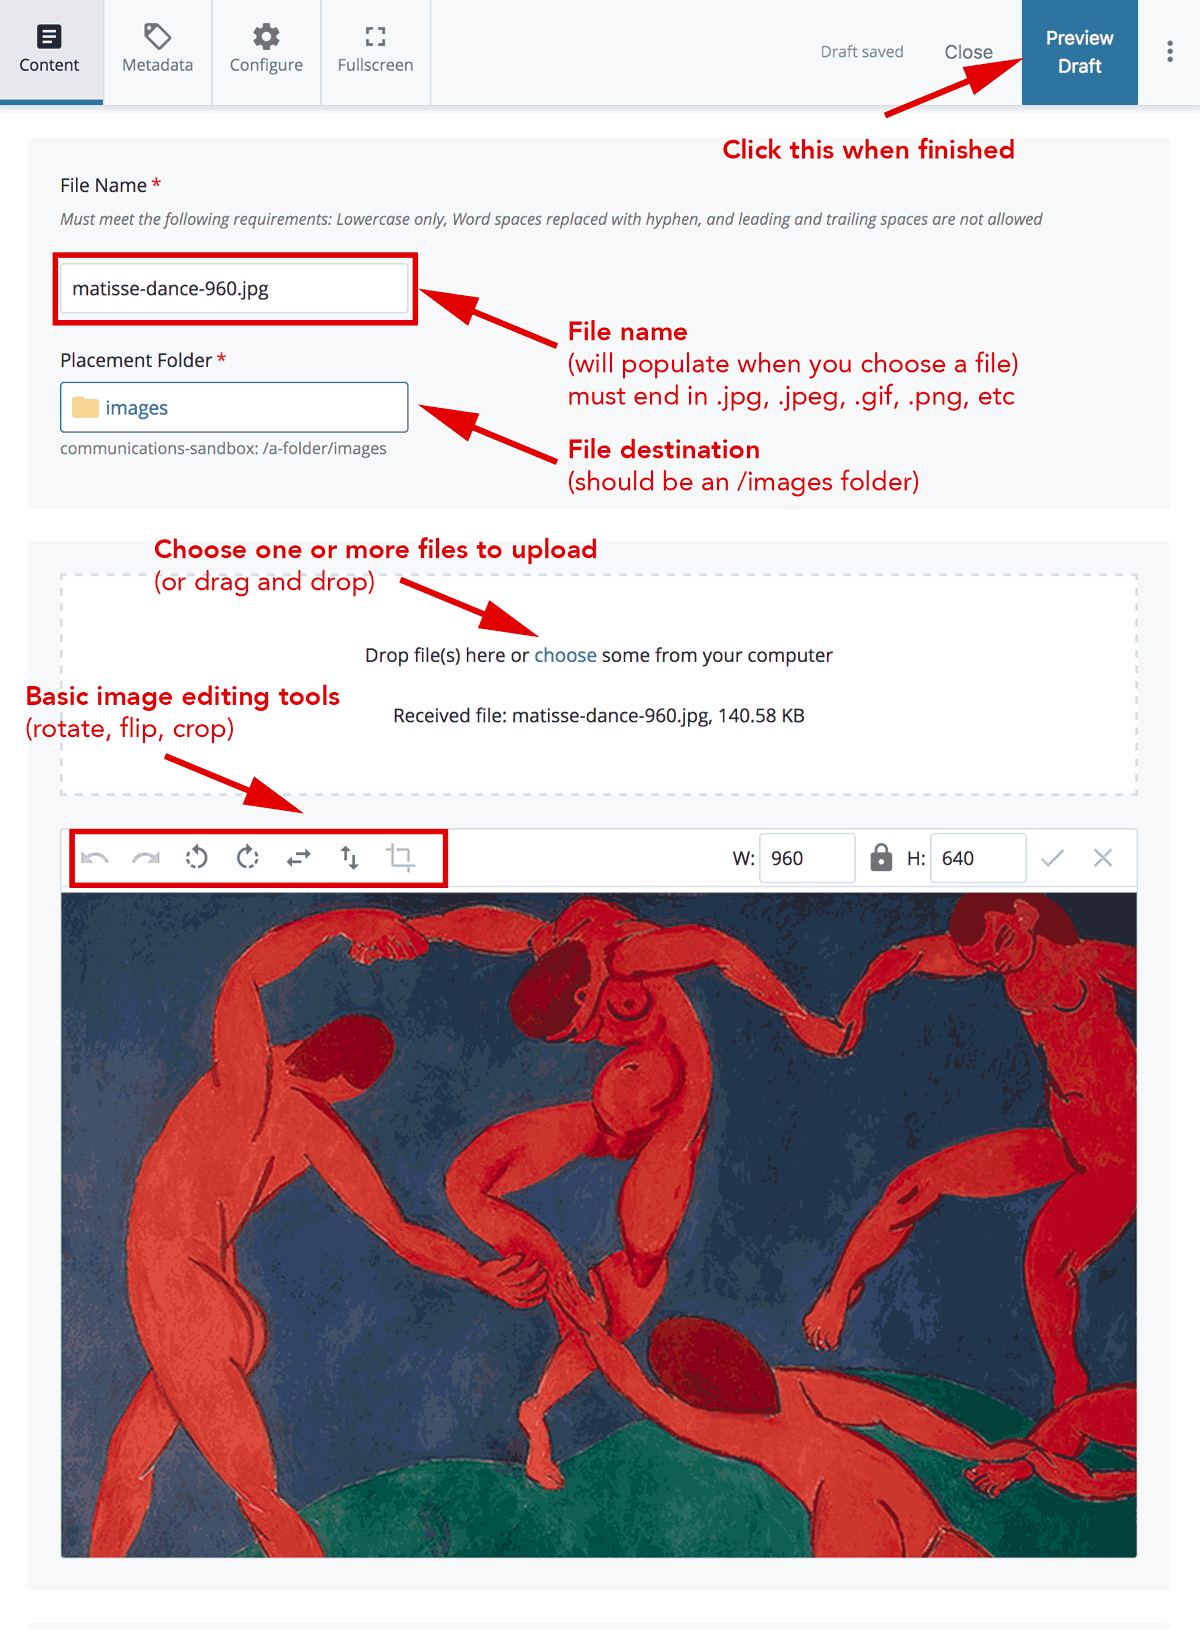
The file name of the file you uploaded will appear in the File Name box. A preview of your image will appear below. As a reminder, images should be sized properly before uploaded to the CMS. Full sized images will make your web pages load slowly.
Best Practice: Keep file names short; use only lowercase letters, numbers, and dashes. Do not use spaces or underscores.
-
Once you are done, click the three dots ("kabob" menu) next to Preview Draft at the top right. Click the blue Check Content & Submit button, then click the checkbox to save your work.
The file will appear in the specified folder in the system. You can now use it on a page or as part another asset, such as a block.
Updating/Replacing a File (PDF, image)
If you've previously uploaded a file to Cascade, you can update/replace it with a newer version without starting from scratch. Replacing the file has a major advantage: the links you and other web editors have created will be maintained by Cascade.
- Select the file you need to update. Click Edit.
- Using the Browse button or “drag and drop” functionality, upload the new version of the file to the CMS. For instructions, see "Uploading a File (PDF, image)" above. Once you select the file, its file name will appear next to Received file. Click Submit. The new file will appear using the old file name.
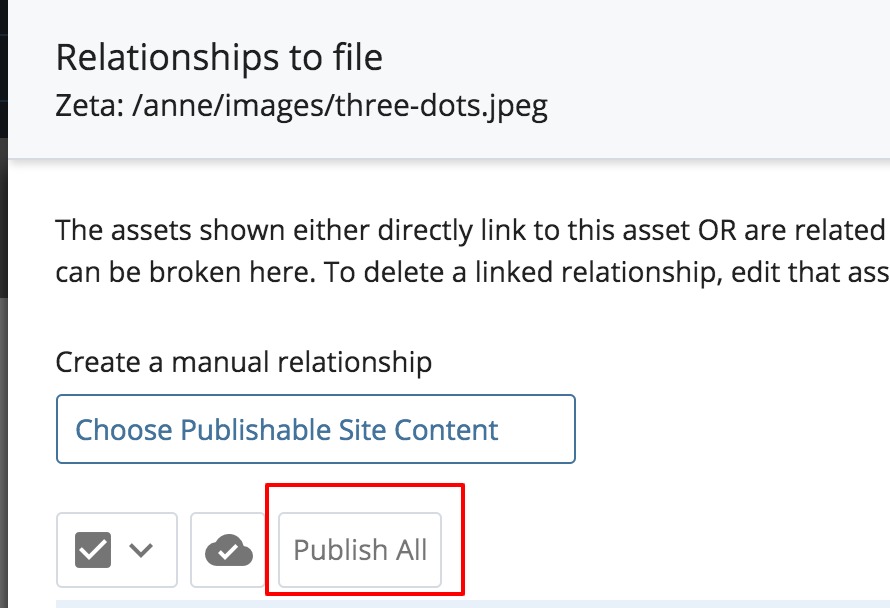
- While the file is selected, click on Relationships. The pages with links to the file will be displayed.
- Click Publish all relationships.
If you need to rename a file, follow the Rename instructions.
- Getting Started
-
Building and Editing
-
Building and Editing Basics
- Creating a New Page
- Submitting an Asset
- Inserting and Formatting Text
- Formatting Options: The “Formats” Menu
- Inserting Links
- Inserting Anchors
- Adding and Editing Folders
- Uploading and Updating Files
- Editing an Existing Page
- Creating a Mirror Page
- External Link Assets
- Creating a Transcript Page
- Moving, Renaming, or Copying an Asset
- Publishing and Un-publishing
- Deleting and the Trash
- Viewing and Restoring Versions
- Updating Your Site's Navigation
- The Chooser Panel
- Content Types
- Images and Multimedia
-
Building and Editing Basics
- Accessibility
- Best Practices
- Frequently Asked Questions
- A-Z Help List
- Home